It plays musical notes and lights will be turn on depending on the notes being played.
Beacuse I like to play musics especially on a piano and was curious if arduino was able to make something similar. Another reason is that I will be able to bring the project home and connect it to my own arduino to have a mini size piano on my desk.
.jpg)
I have decided to make the it in a box shape so that it will be easy and fast to cut which helps to save time. Adding a LCD screen also allows the users to see the current note being played and adding neopixel helps make the product looks nicer
| Techinque | Which parts? |
|---|---|
| 3D-Printing | All the tiles and key holder |
| Laser Cutting | Box |
| fusion360 | Hardware design |
| Processing System | Arduino and comapatable CPU |
| Input Devices | Push buttons |
| Output Devices | Neopixel, LCD screen and Buzzer |
| Power | Single 5V DC plug |
| No. | Quantity | Description | Cost |
|---|---|---|---|
| 1 | 1 | Arduino Uno | $9.90 |
| 2 | 5 | Push Button | $0.30 |
| 3 | 5 LED | Neopixel | $0.80 for 5 LED |
| 4 | 1 | Buzzer | $0.20 for 1 |
| 4 | 2 | A3 2.5mm Ply Wood | - |
| Type | Fusion |
|---|---|
| Left tile (white) |
|
| Middle tile (white) |
|
| Right tile (white) |
|
| Black tiles |
|
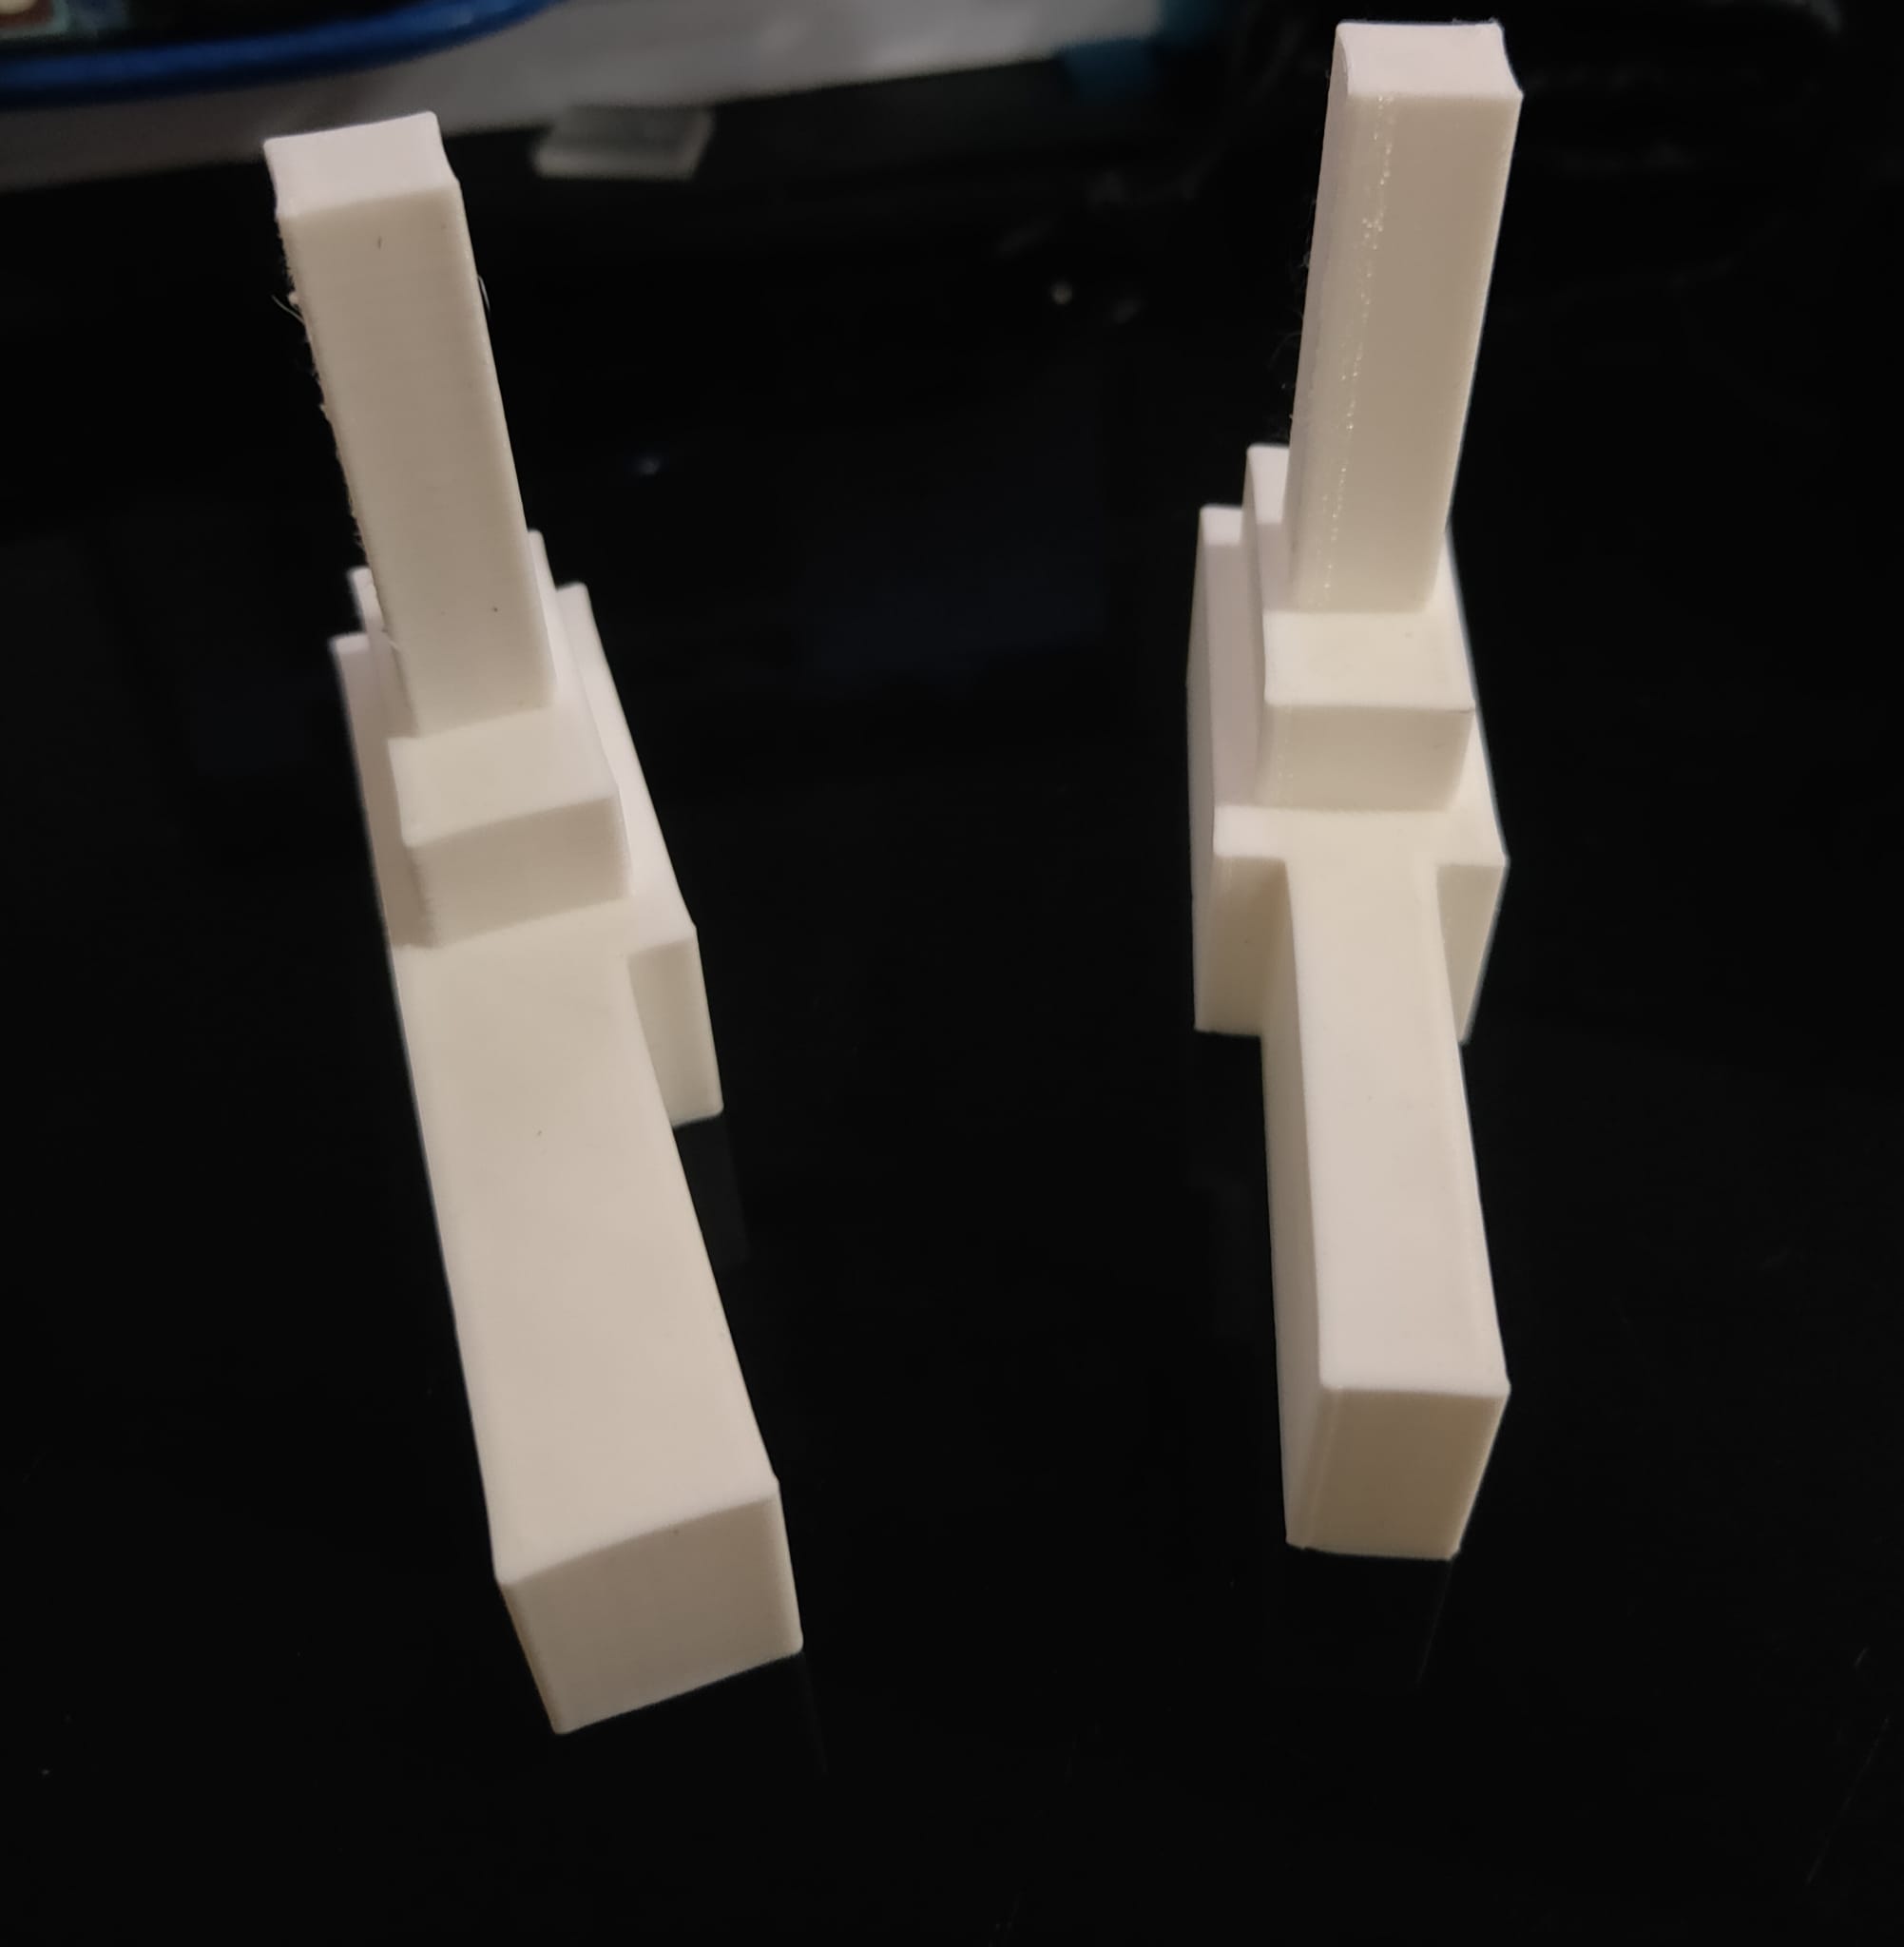
| Key holder |
|
| Box |
|


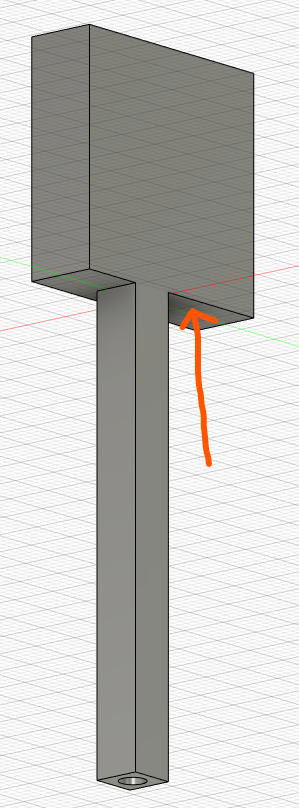
That side (red arrow) will sit nicely on the key holder (blue arrow) with a sponge/spring stick to it so there will be a bit of height for the key to pressed down.
1. I make the base,front and one side.
2. I create a new sketch on the side and front in order to draw out the tabs
3. Once the front and side tabs are drawn I copy and move them to the opposite sides since the dimension are the same.
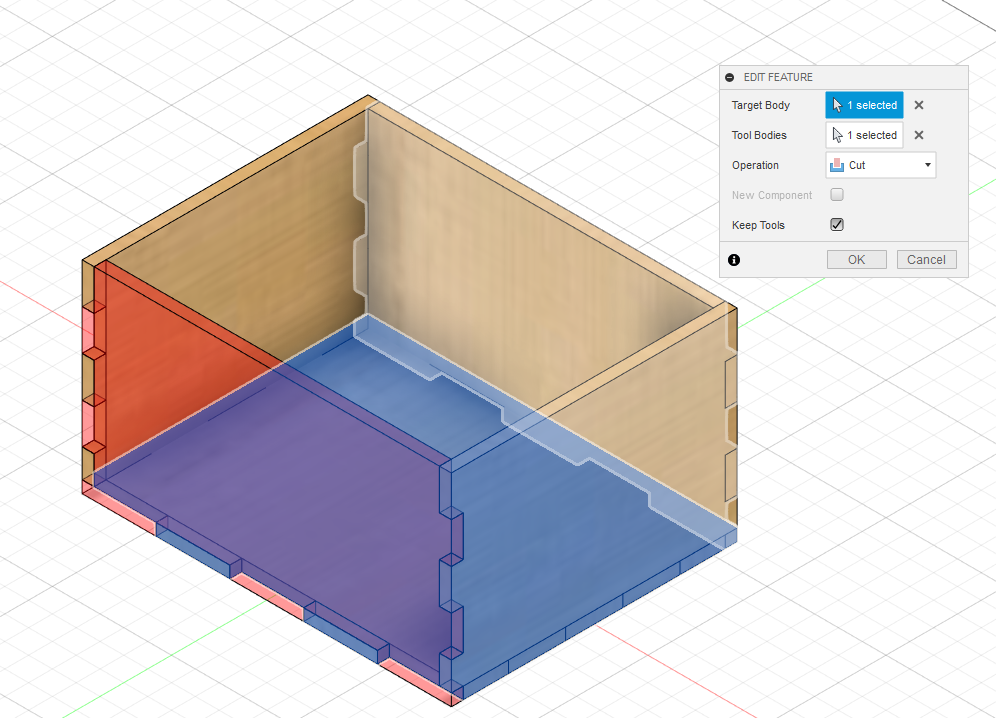
4. Than I use the combine tool to cut and tabs.


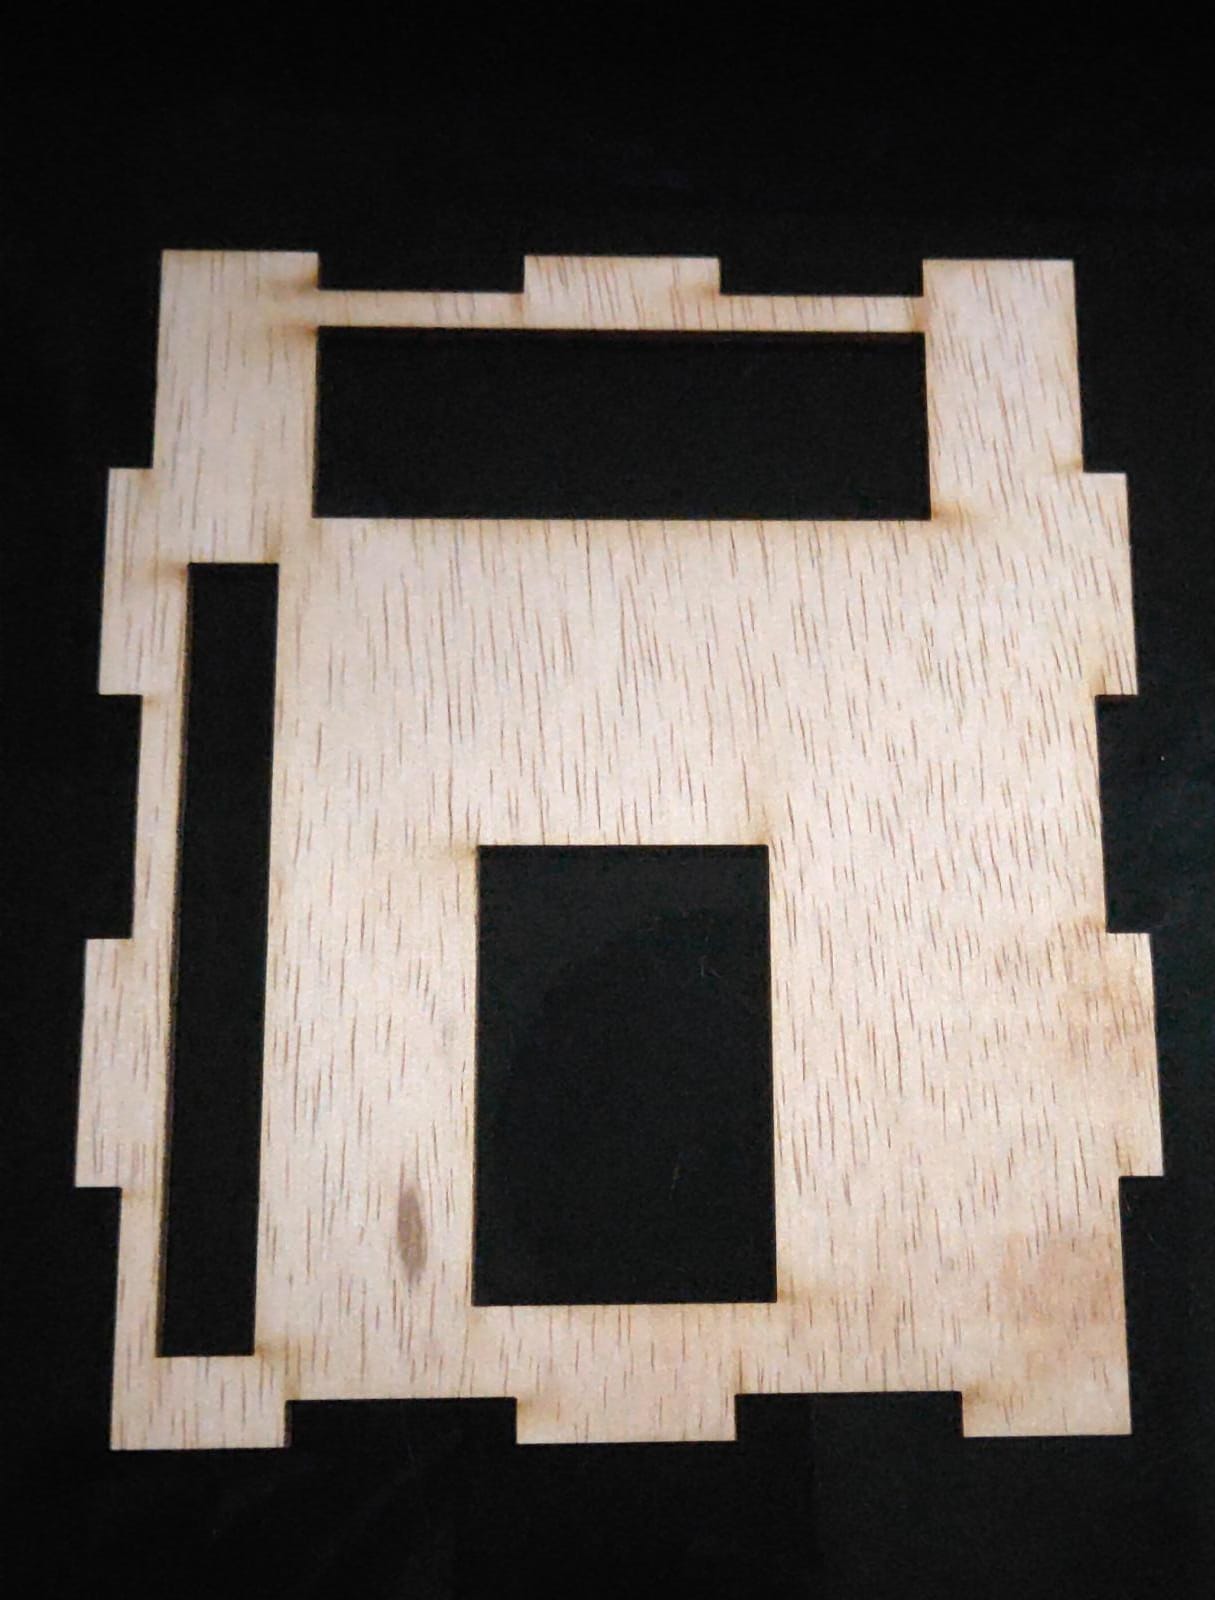
5. After that I create a top piece with the dimension cut out for the input and output devices.
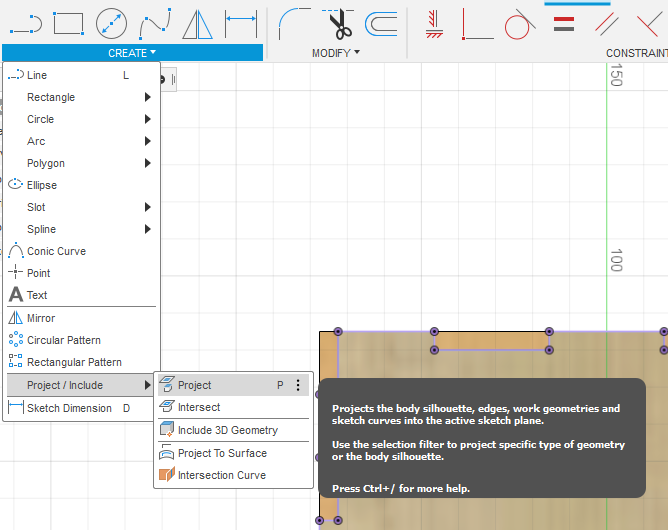
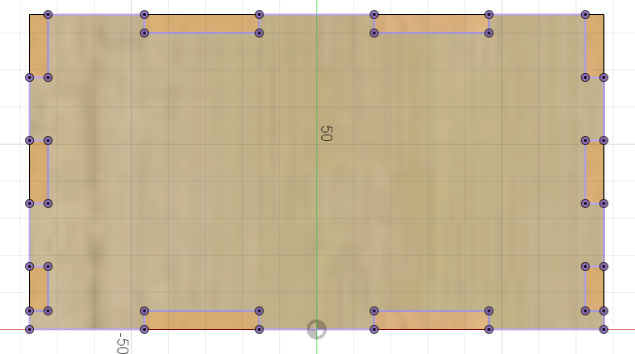
6. Lastly, I create a new sketch for each sid and project geometry all the sides so i can convert them to dxf and put them in inkscape to laser cut.
| Pieces | Sketch/Image |
|---|---|
| Base | 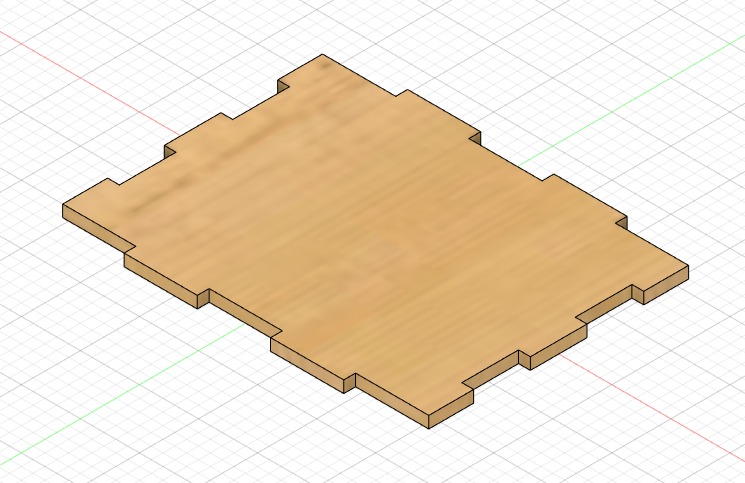
The combine tool was used to cut the tabs of the base plate |
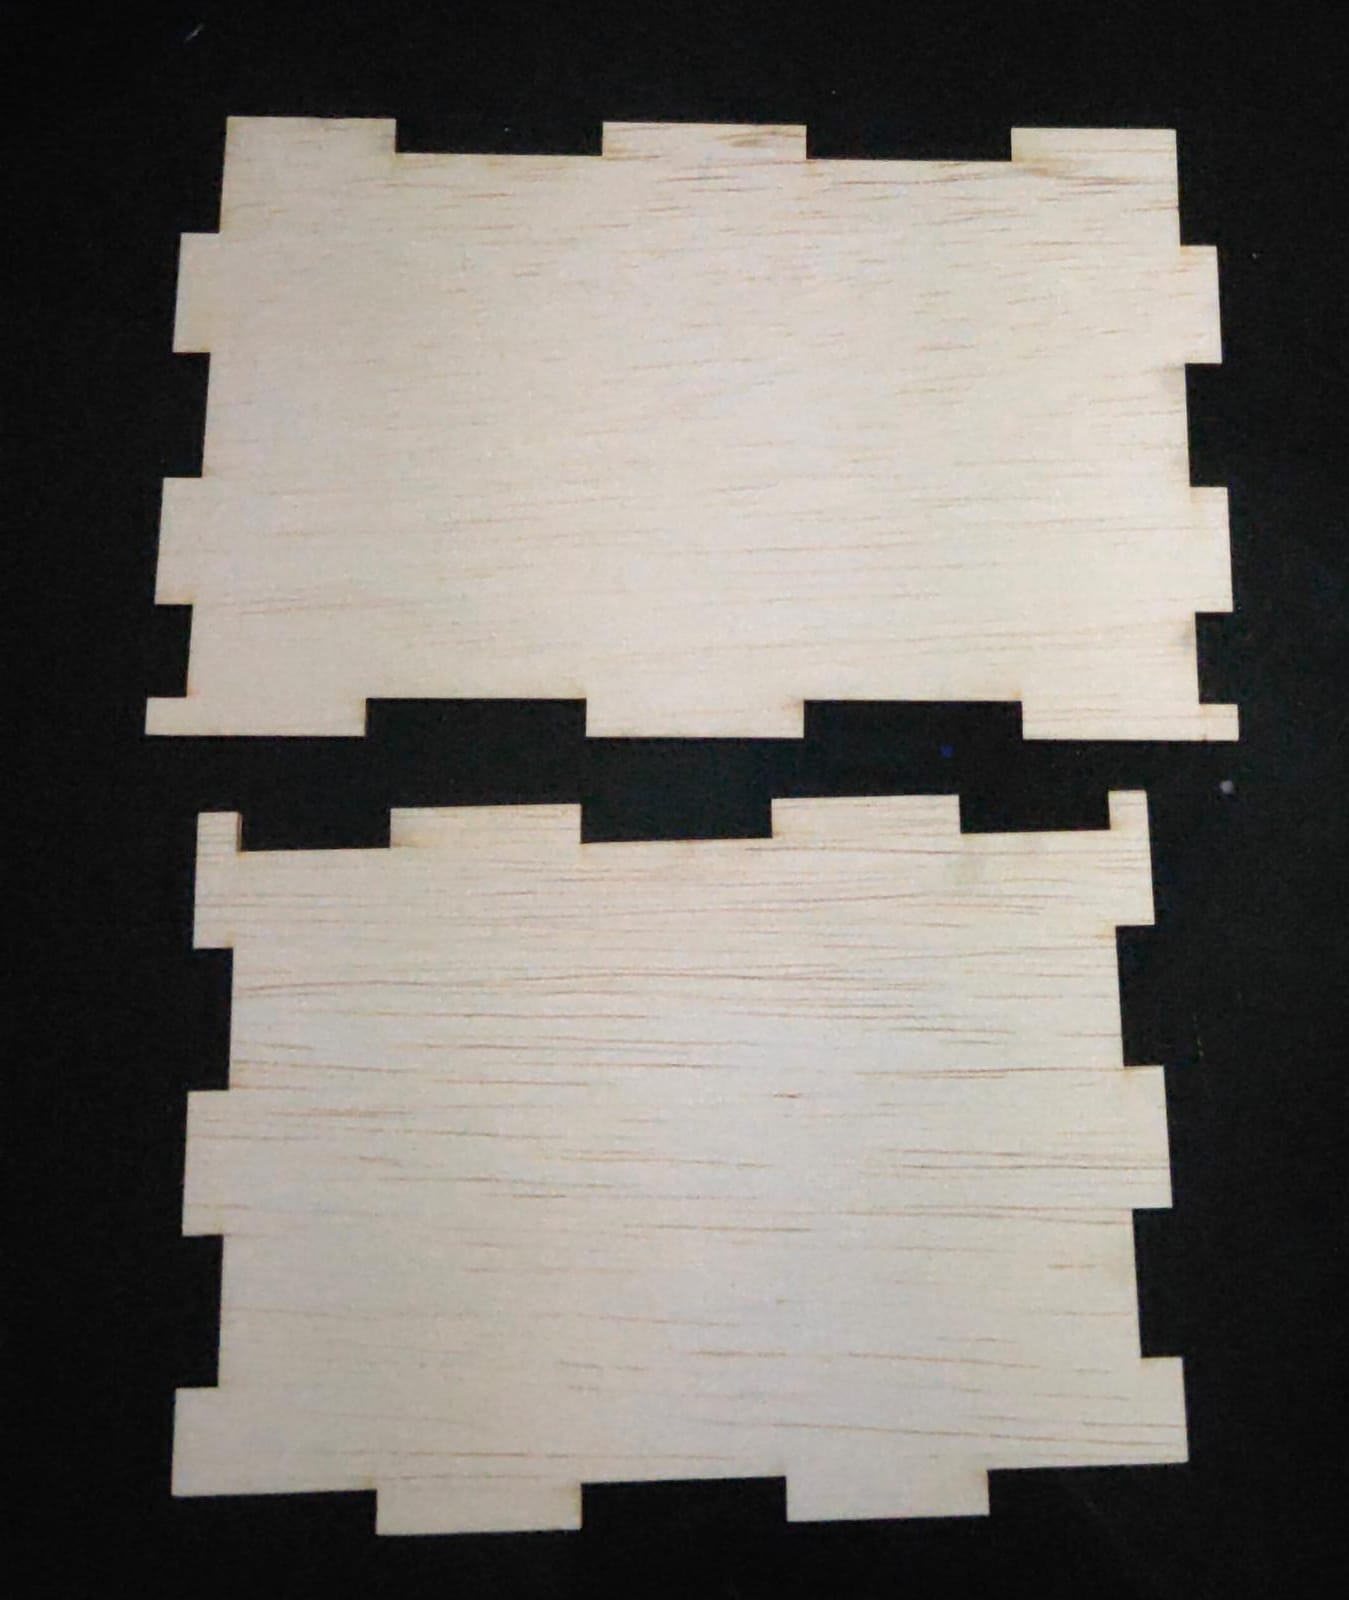
| Front and back | 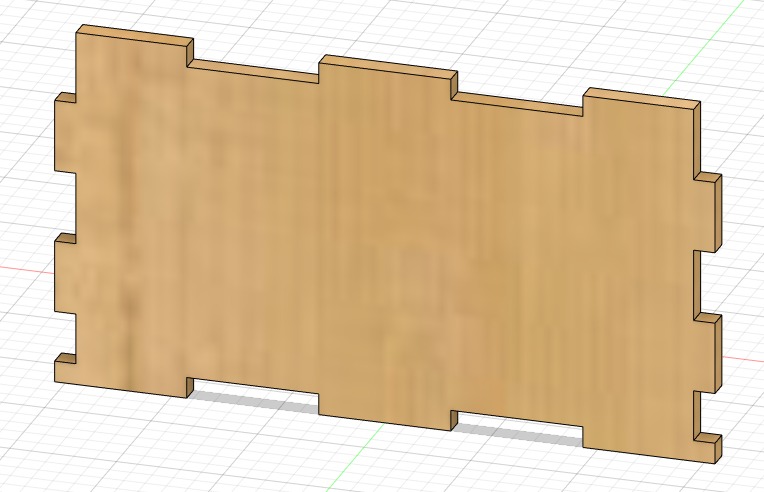 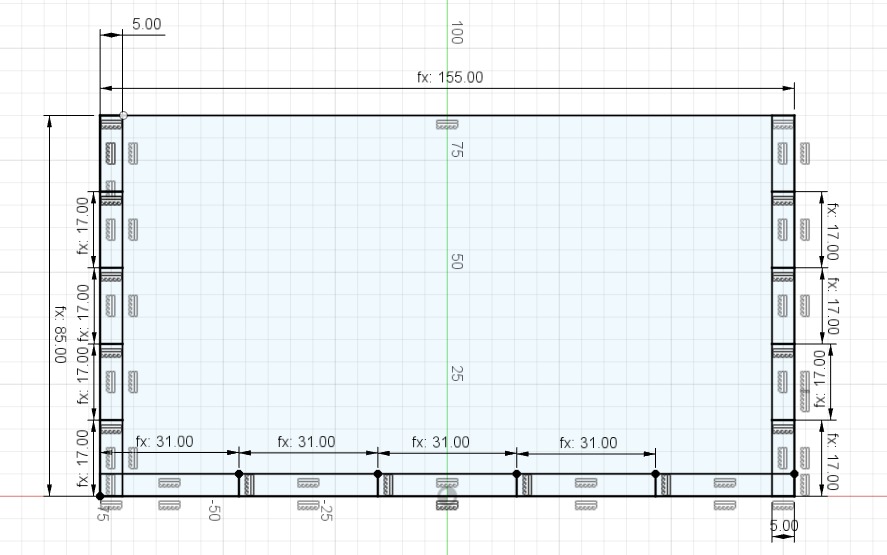
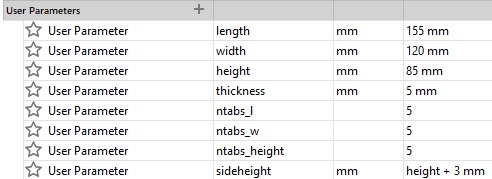
I decided to set the number of tabs to 5, in order to find the dimension of the tabs I use the formula e.g. length/ntabs_l (From the parameters above) |
| Side | 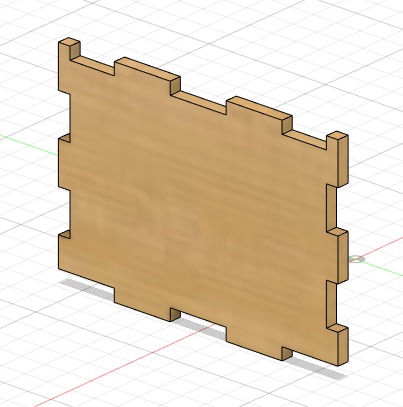 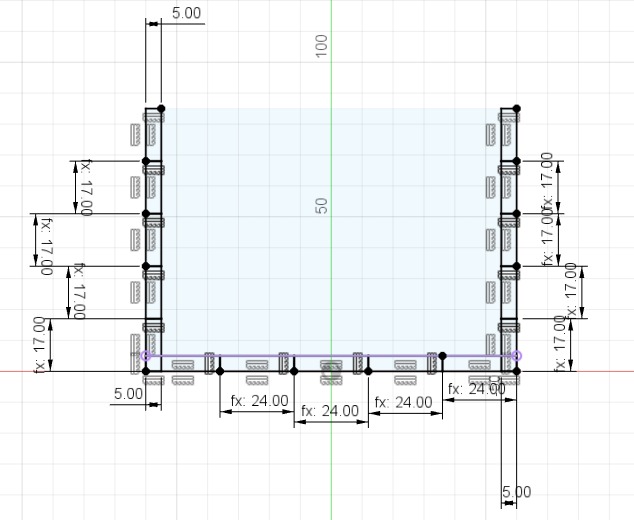
For the sides I have also set the number of tabs to 5, in order to find the dimension of the tabs I use the formula e.g. width/ntabs_w (From the parameters above) |
| Top | 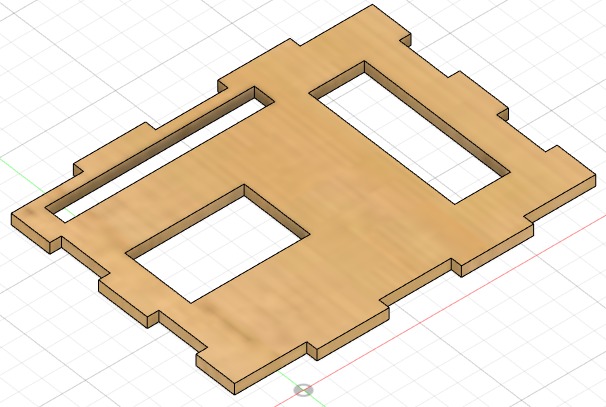 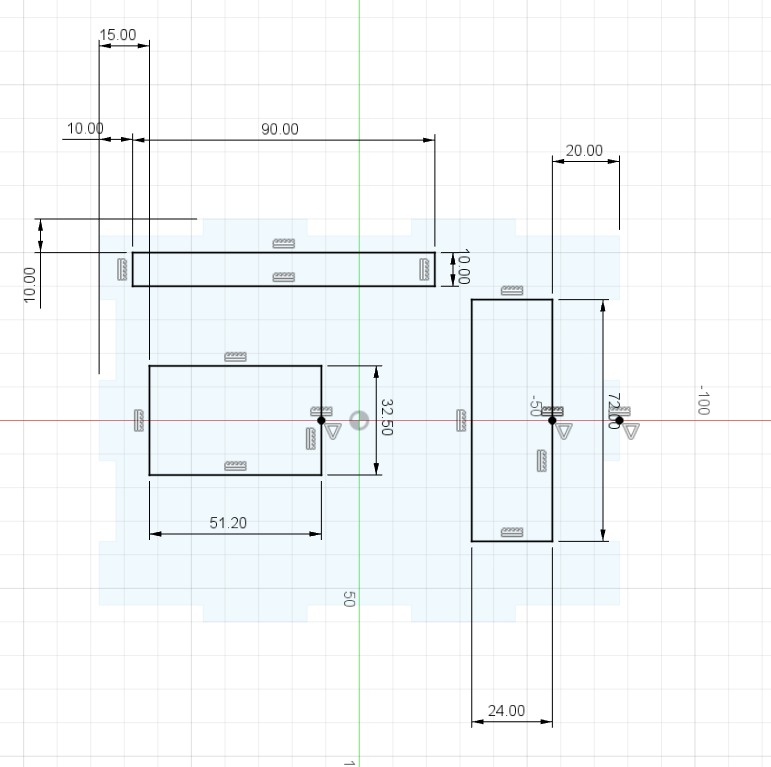
For the top piece I had to measure the dimension of the LCD screen, Neopixel with 5 LED and the assembled piano tiles. After finding the dimension I will have to decide where is the best place to put the devices. |
I use Ultimaker Cura to slice the pieces and check the timing. To able to use Ultimaker Cura I need to convert it into Stl format first.
Go to files > Export > file type : stl > save in the folder you want


| Setting | Infomation |
|---|---|
| Layer height | 0.25mm |
| Infill Density | 10% |
| Infill Pattern | Grid |
| Speed | 80mm/s |
| Support | Yes |
| Build Plate Adhesion | Skirt |
After multiple slicing and check which takes the shortest time to print, I have concluded that printing the all the white tiles together and printing the key holder and black tiles together is faster.
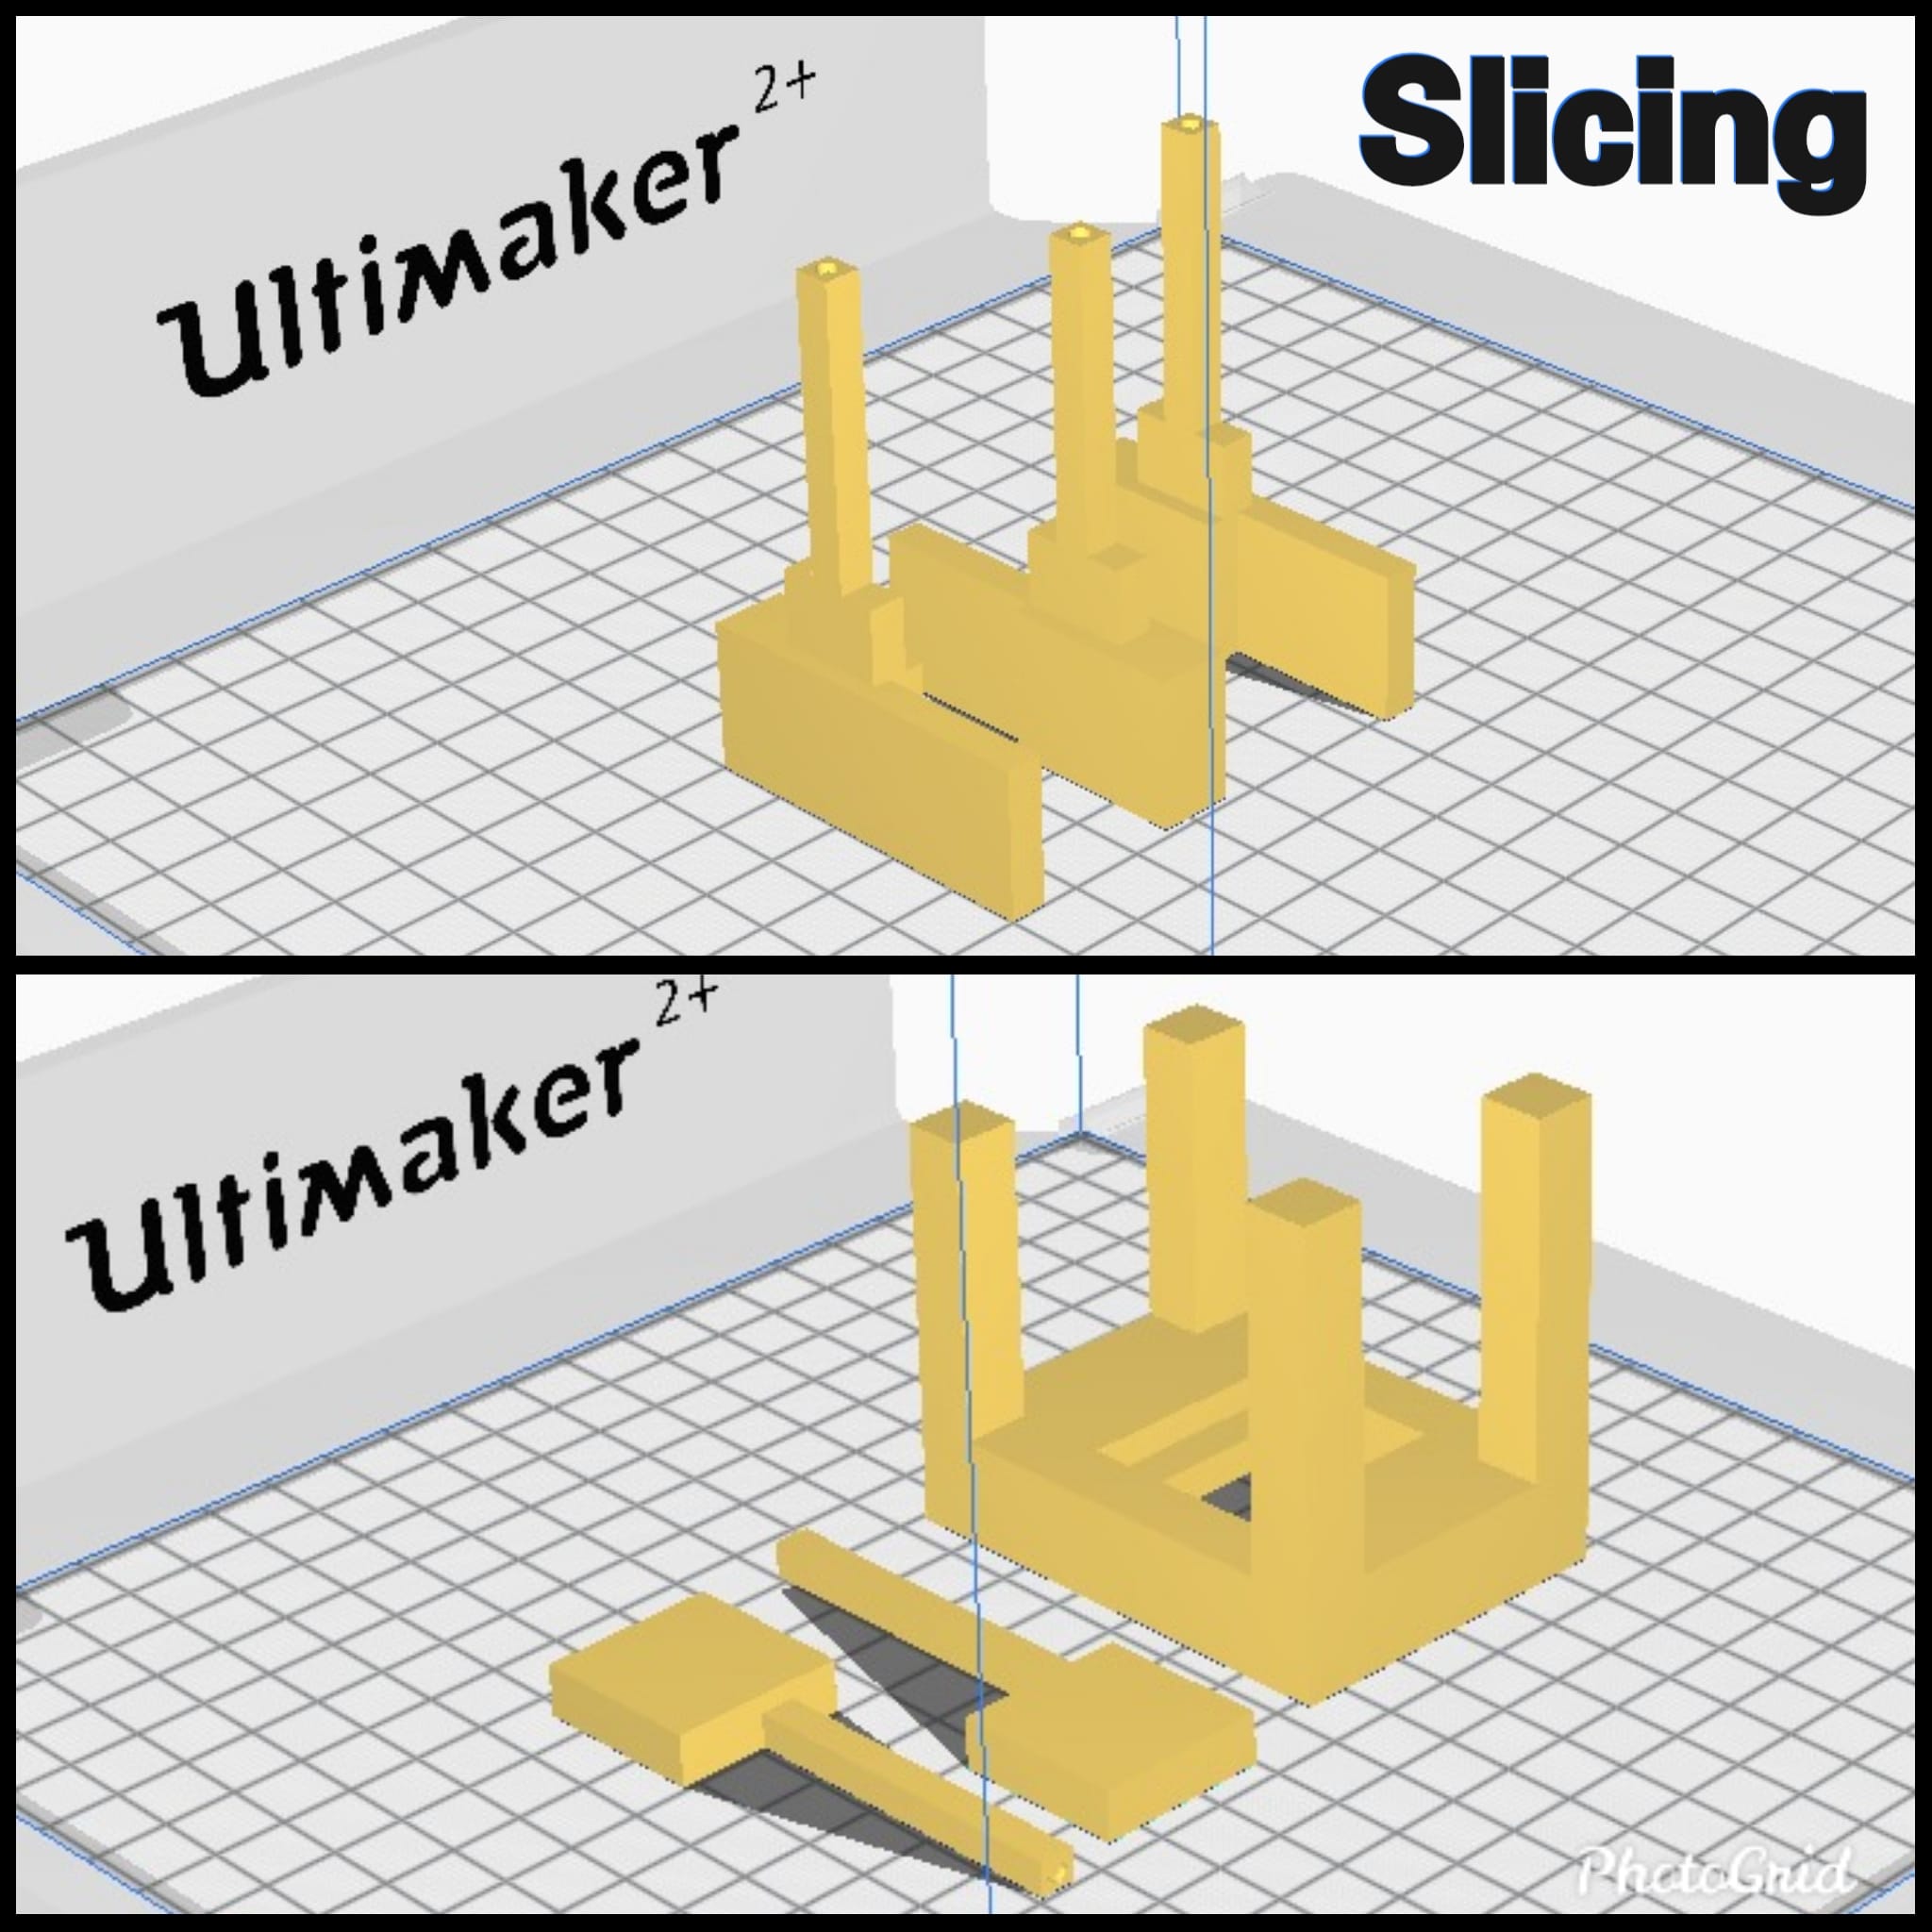
After slicing we can finally start with the printing
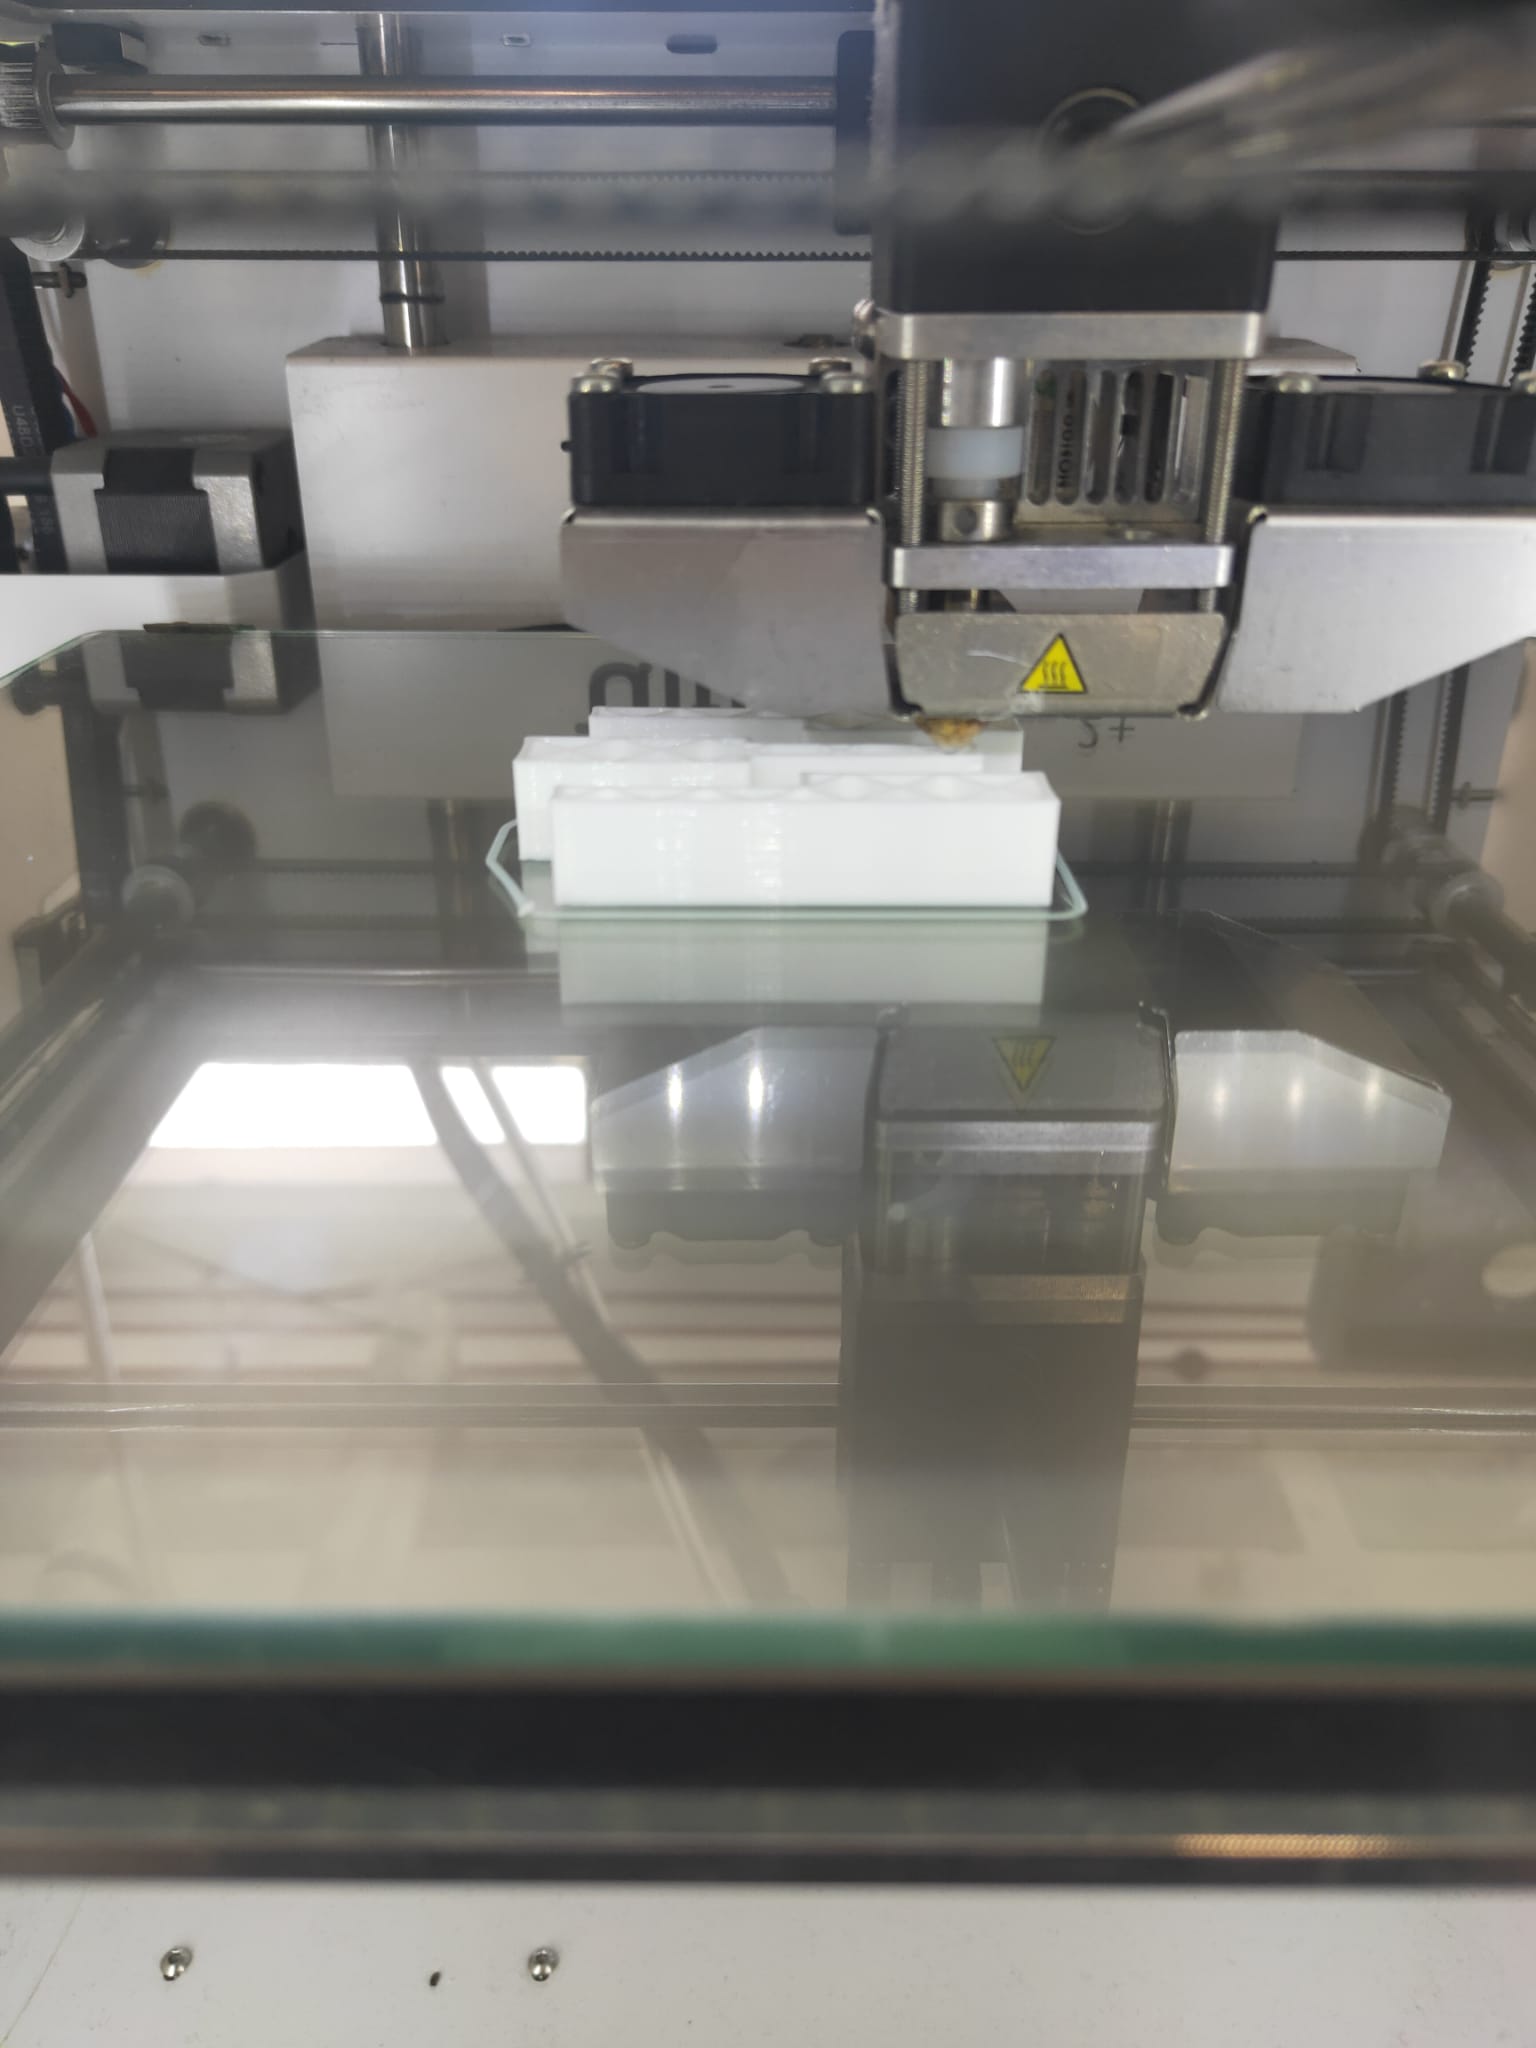
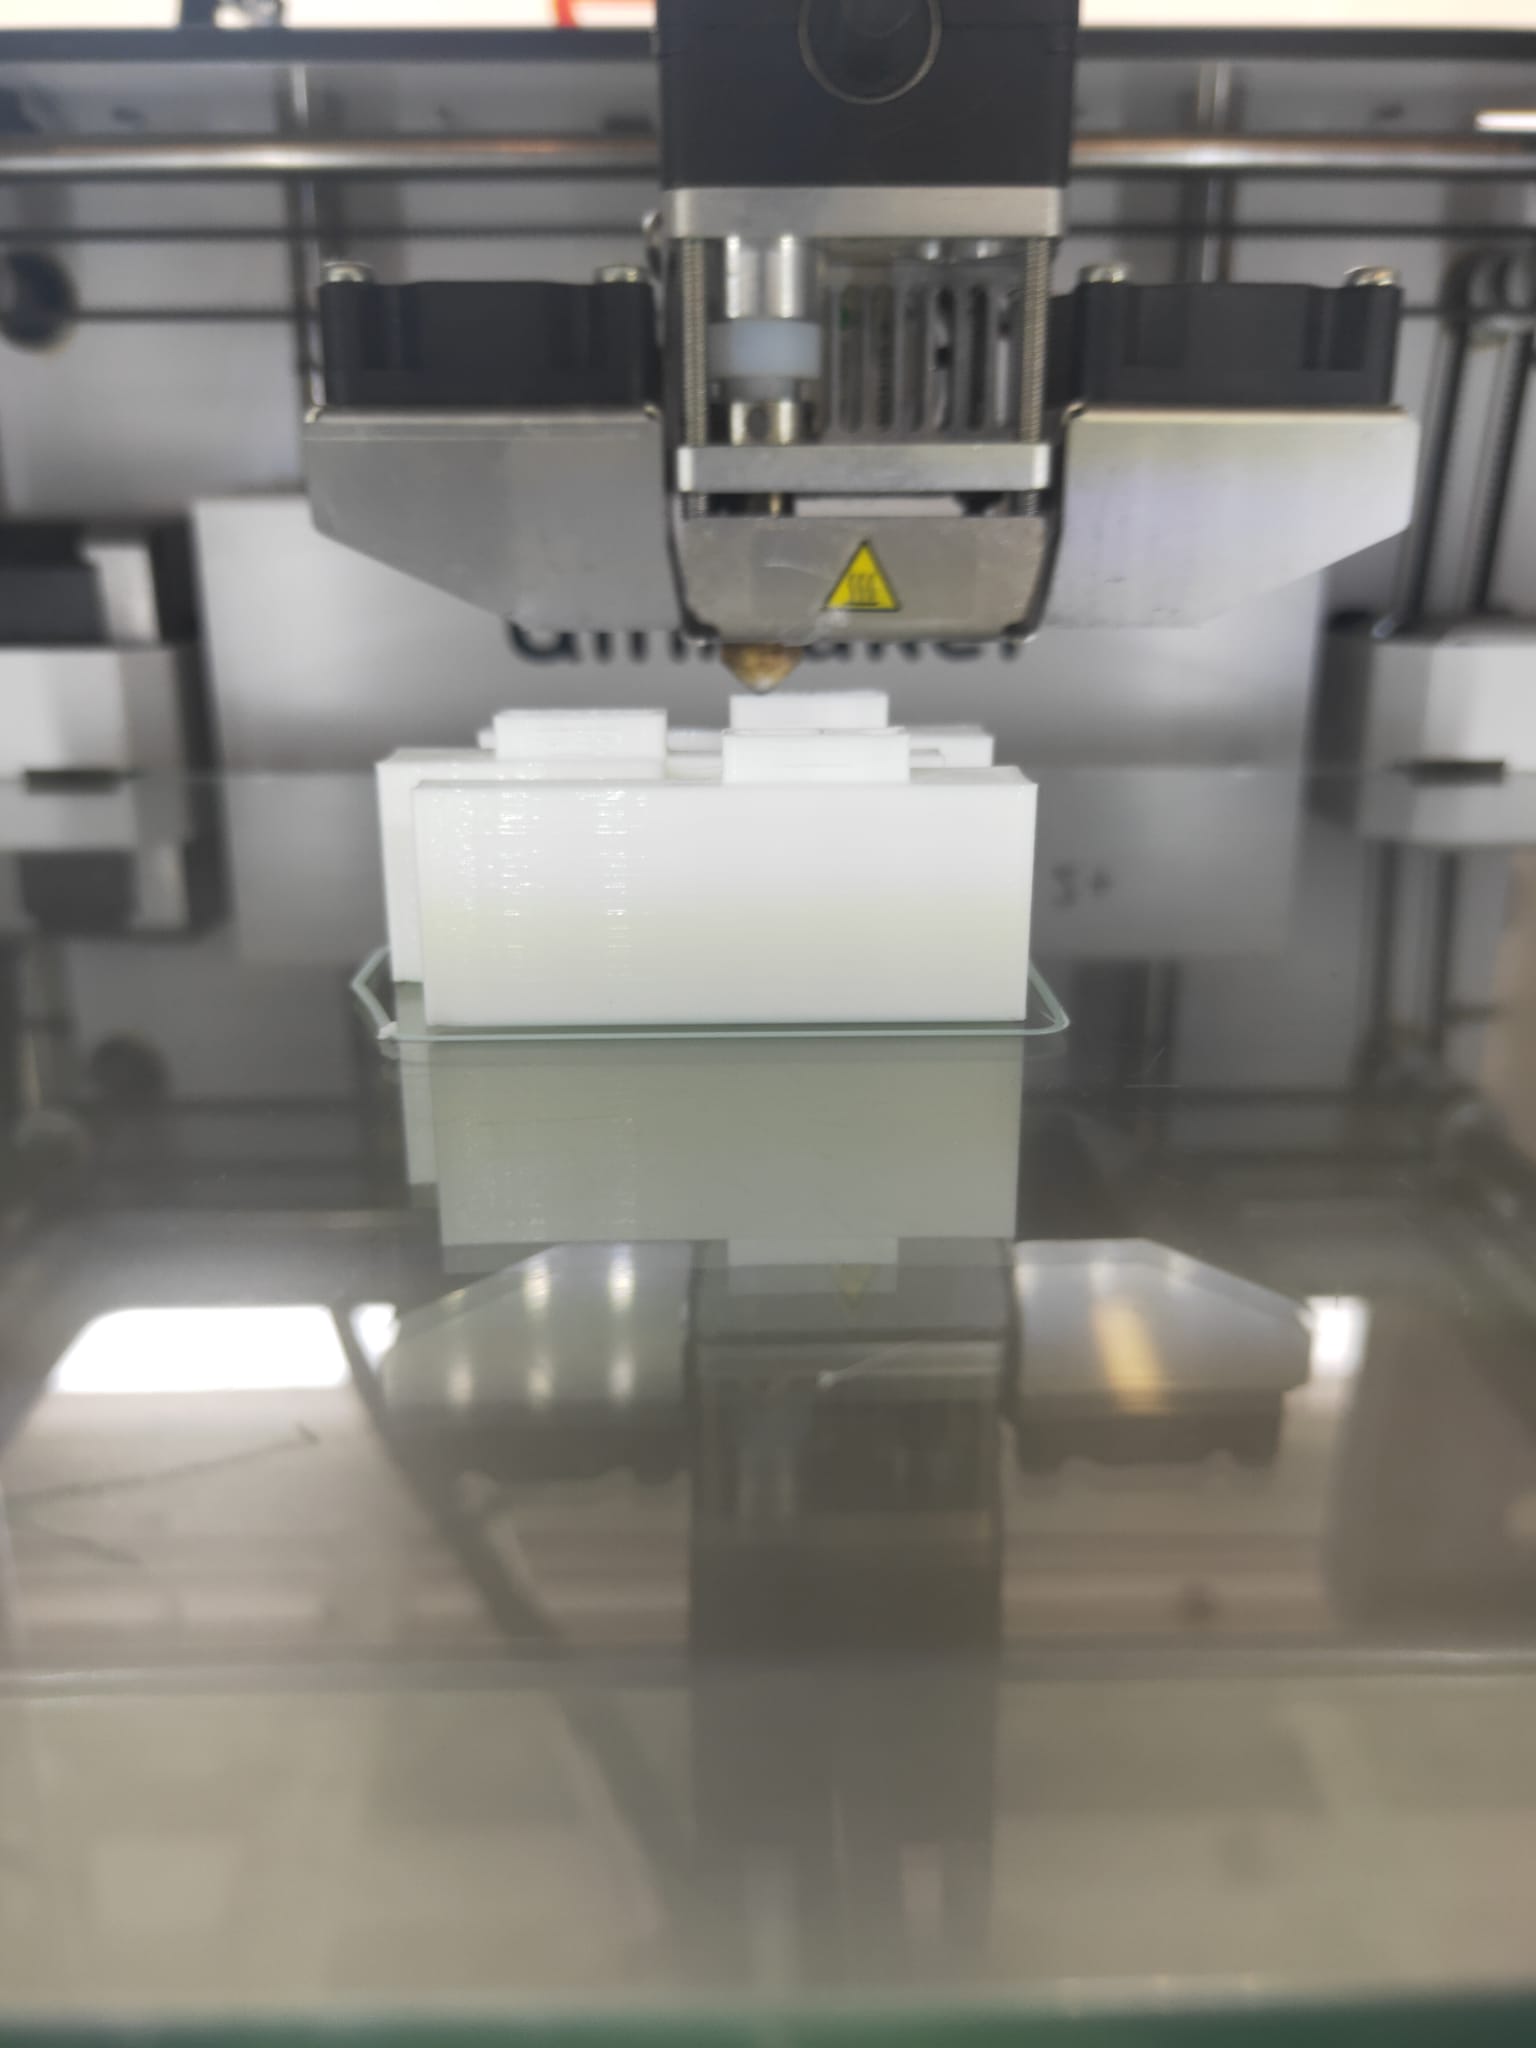
Below is a short clip of the white tiles being printed
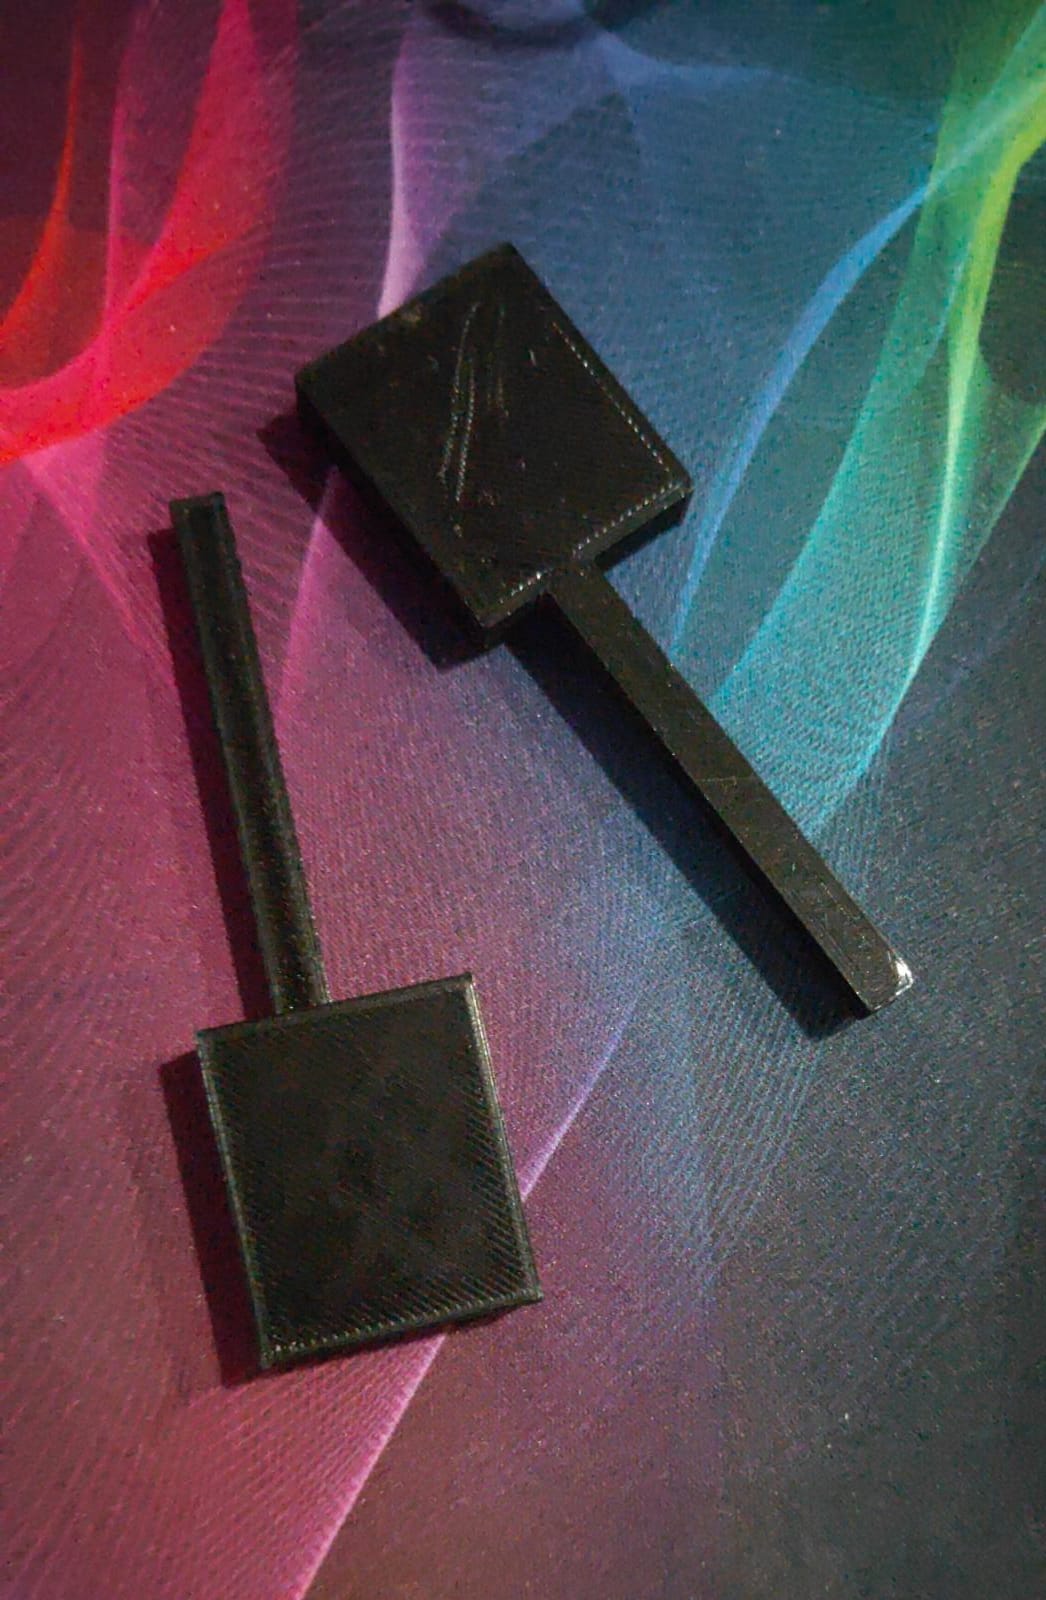
Black tiles and key holder
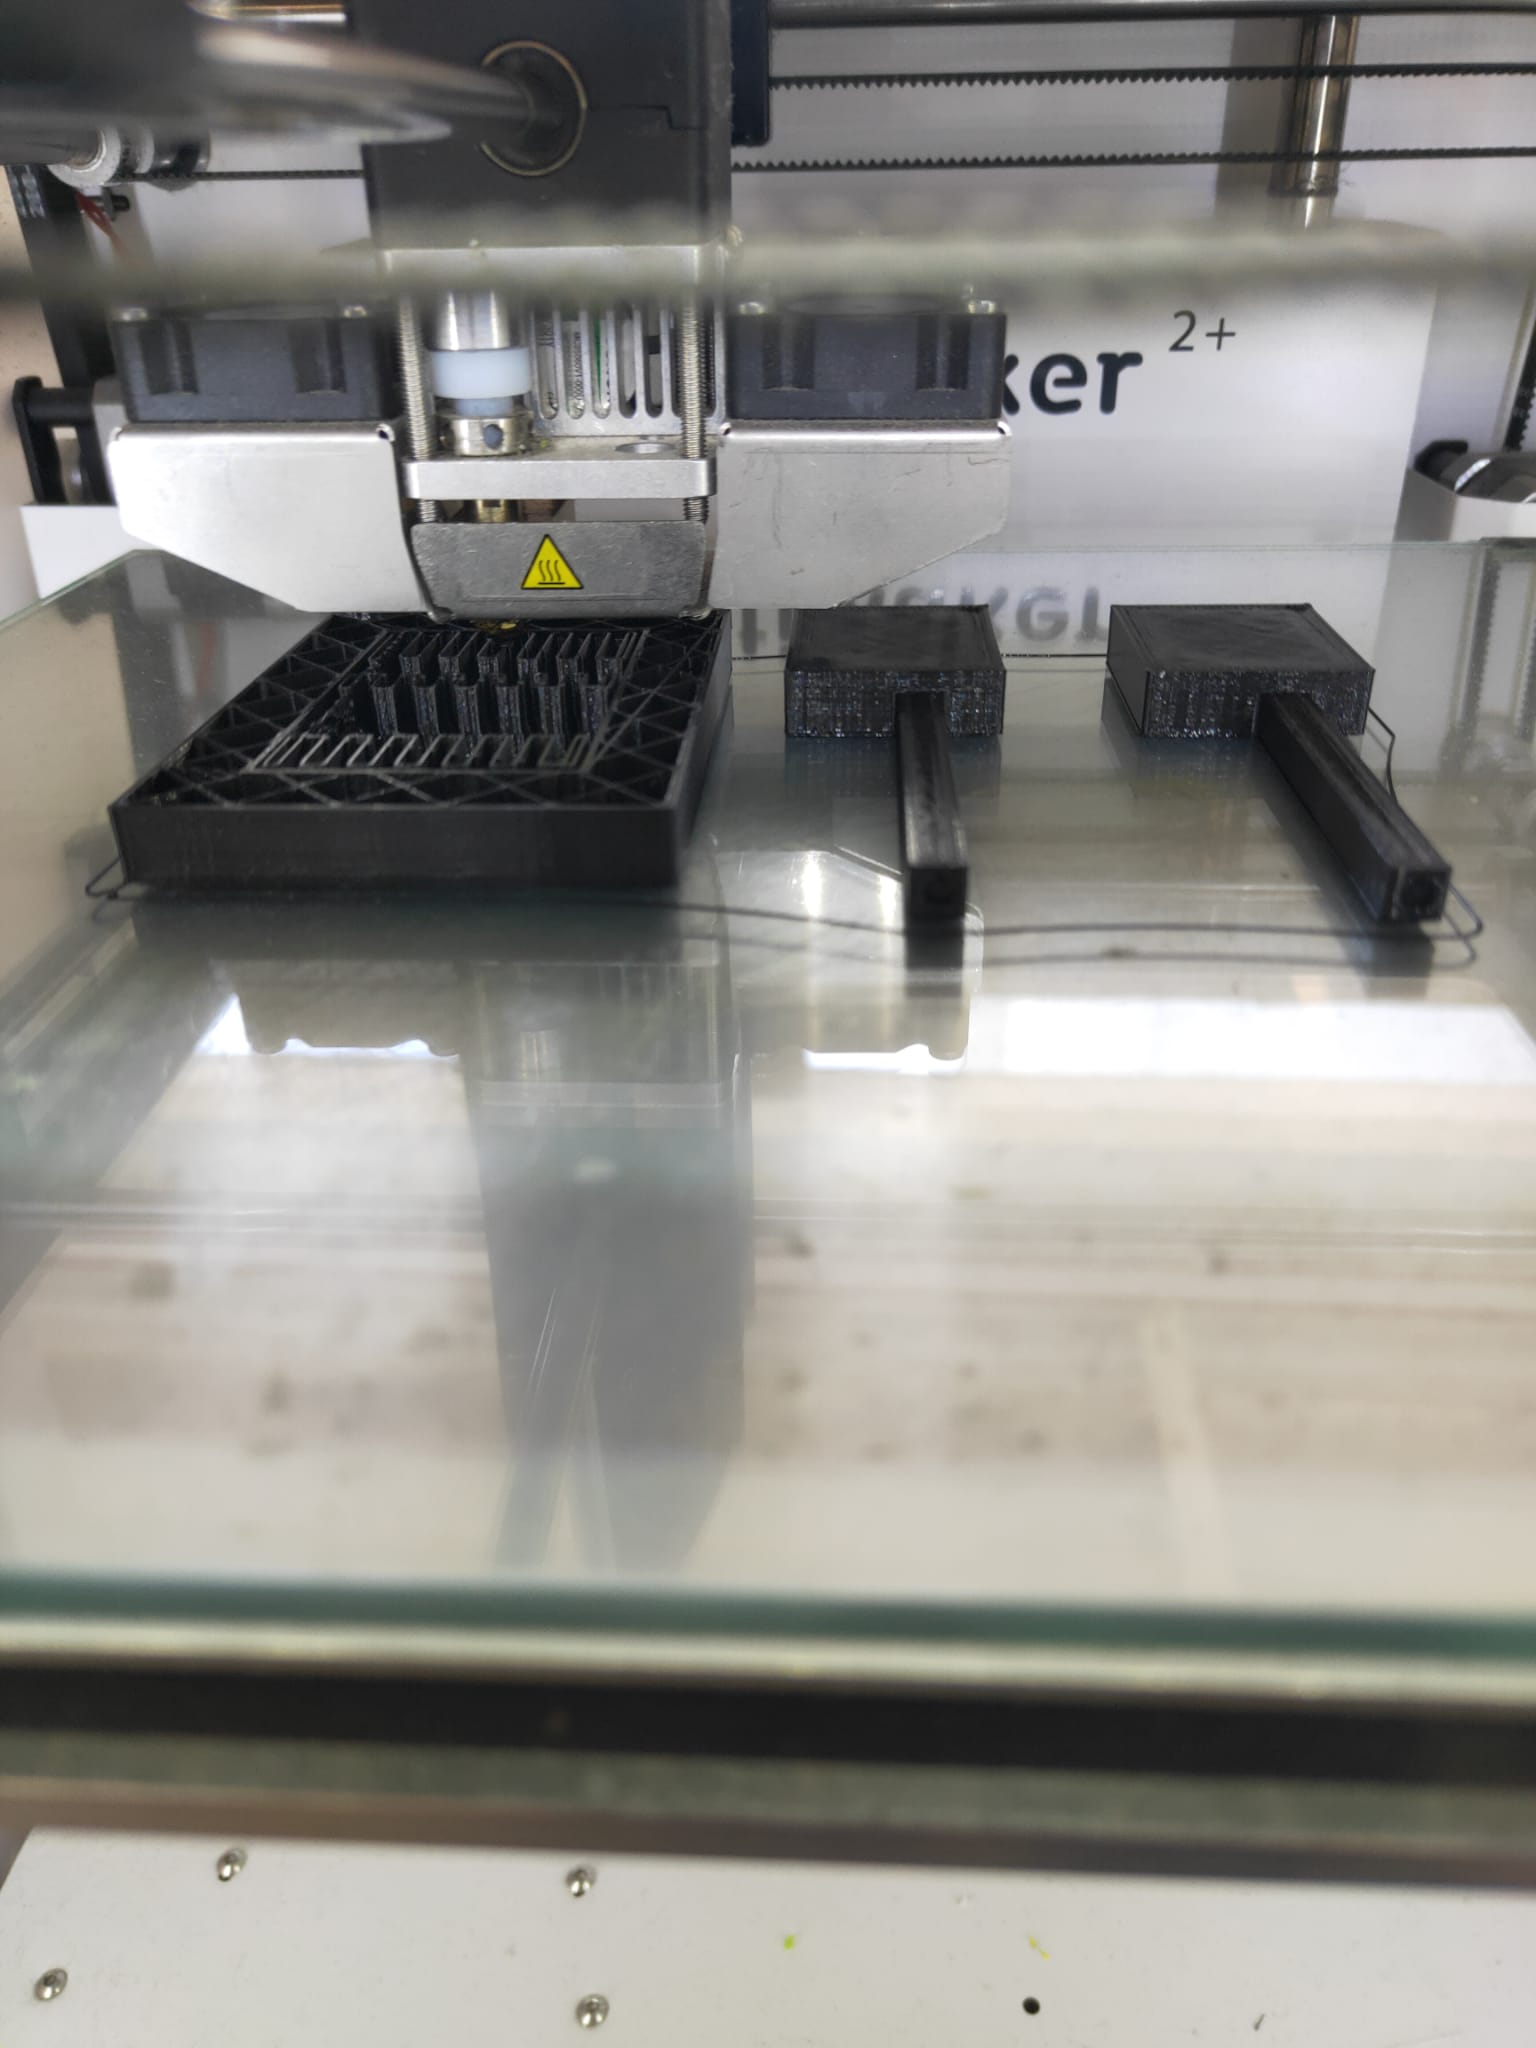
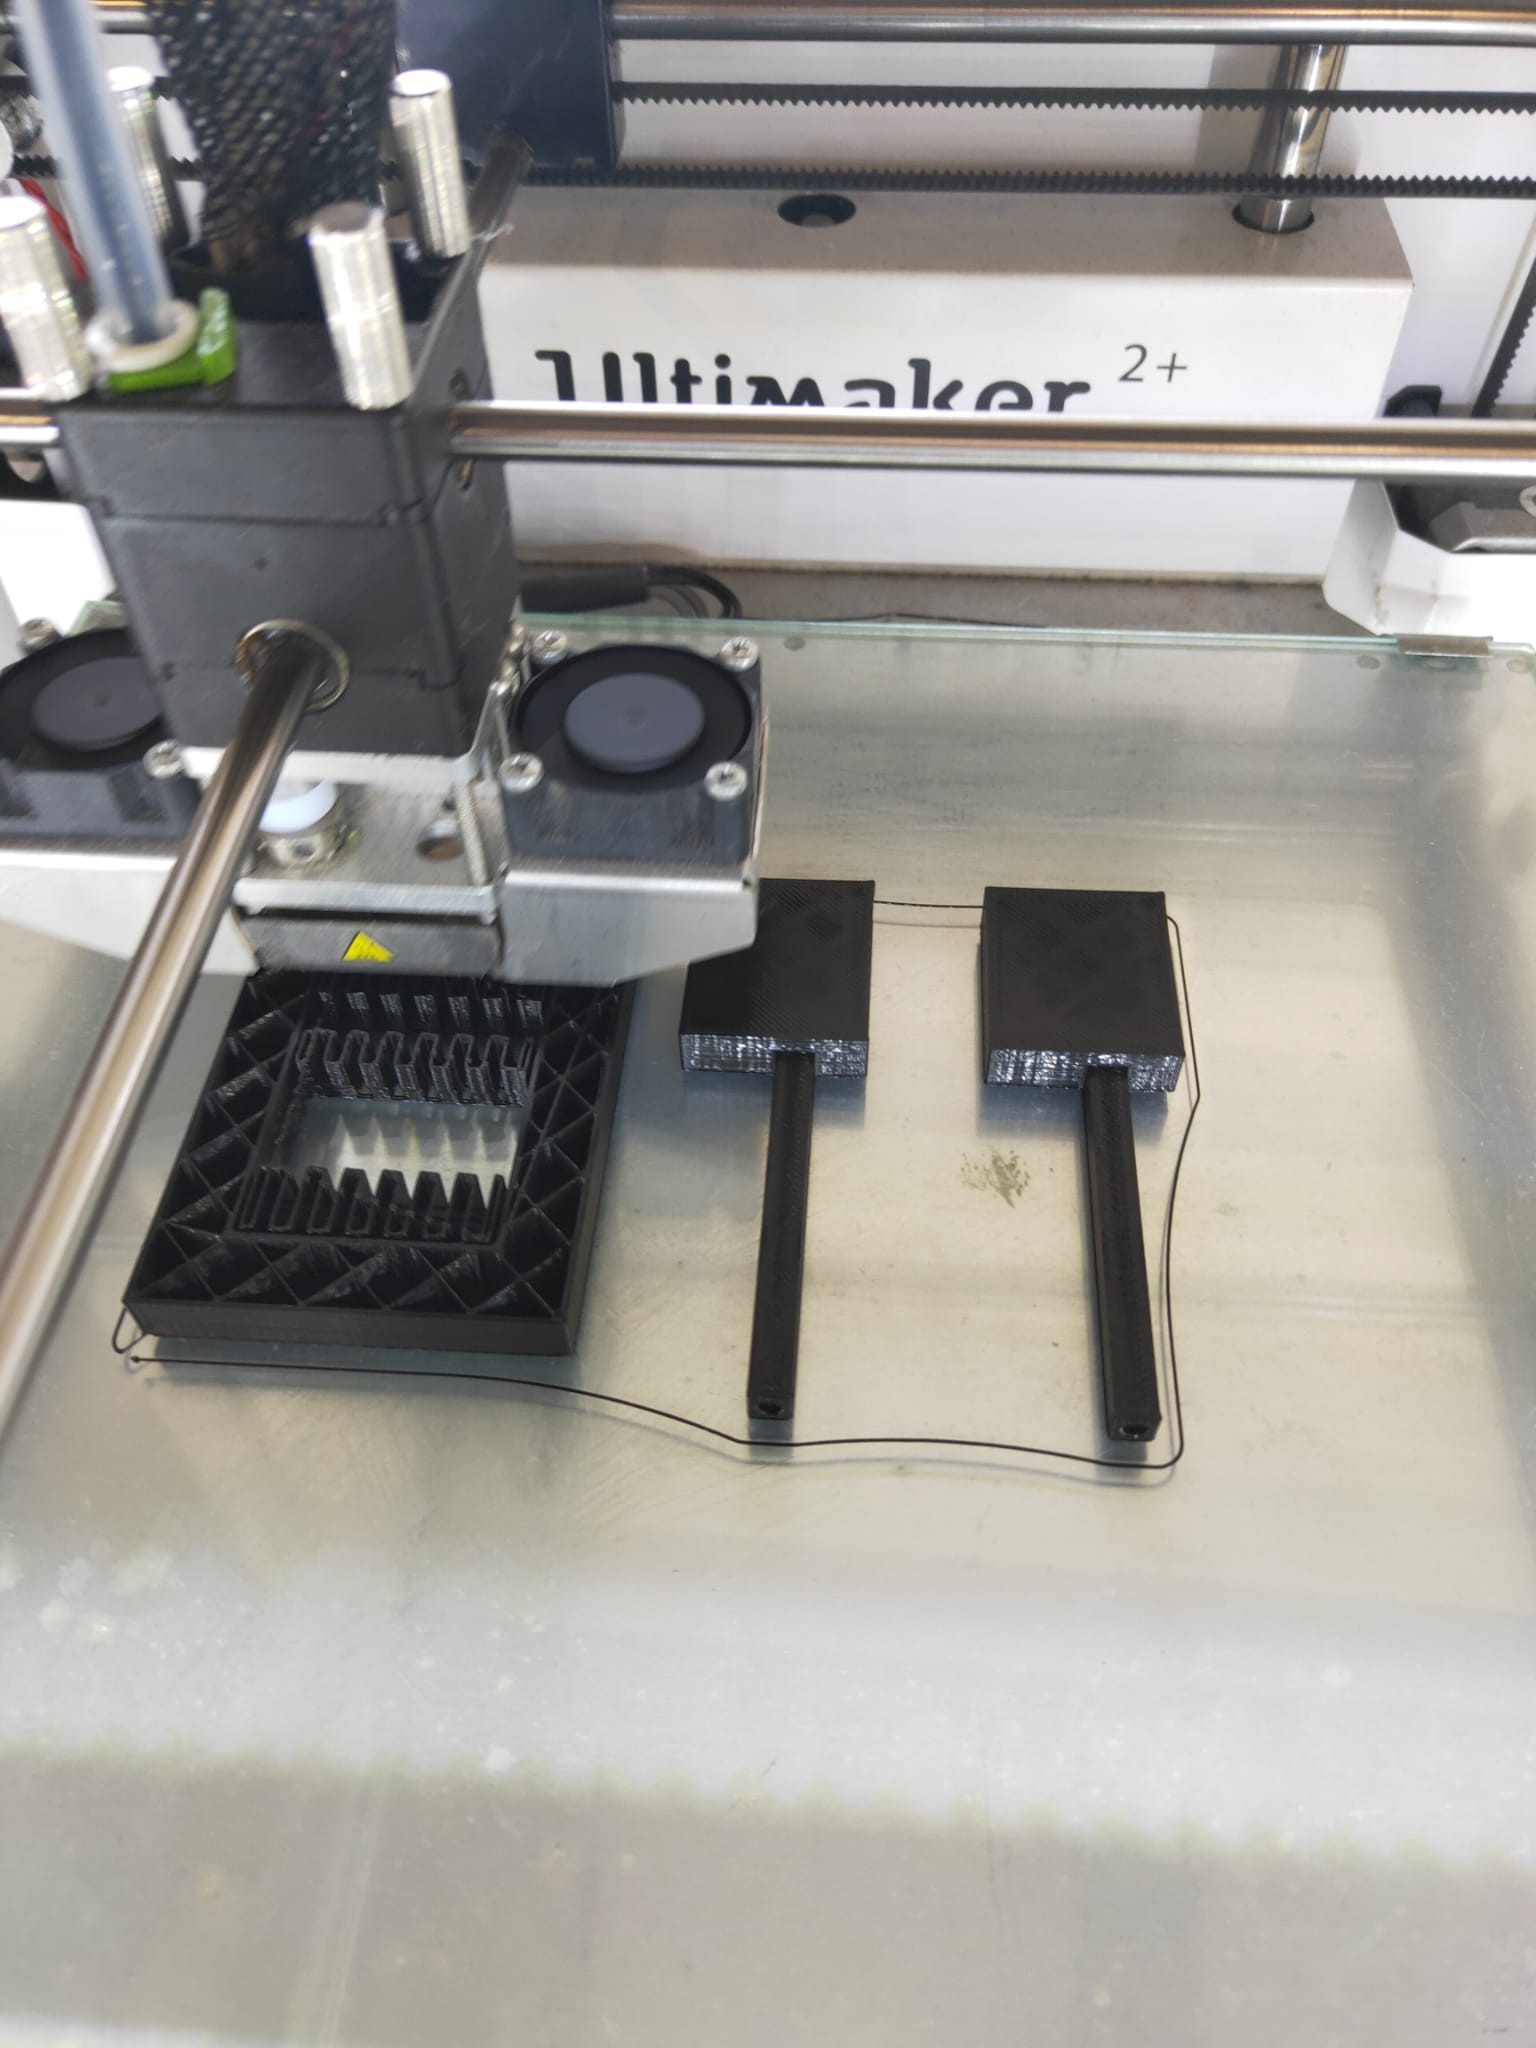
Below is a short clip of the black tiles being printed
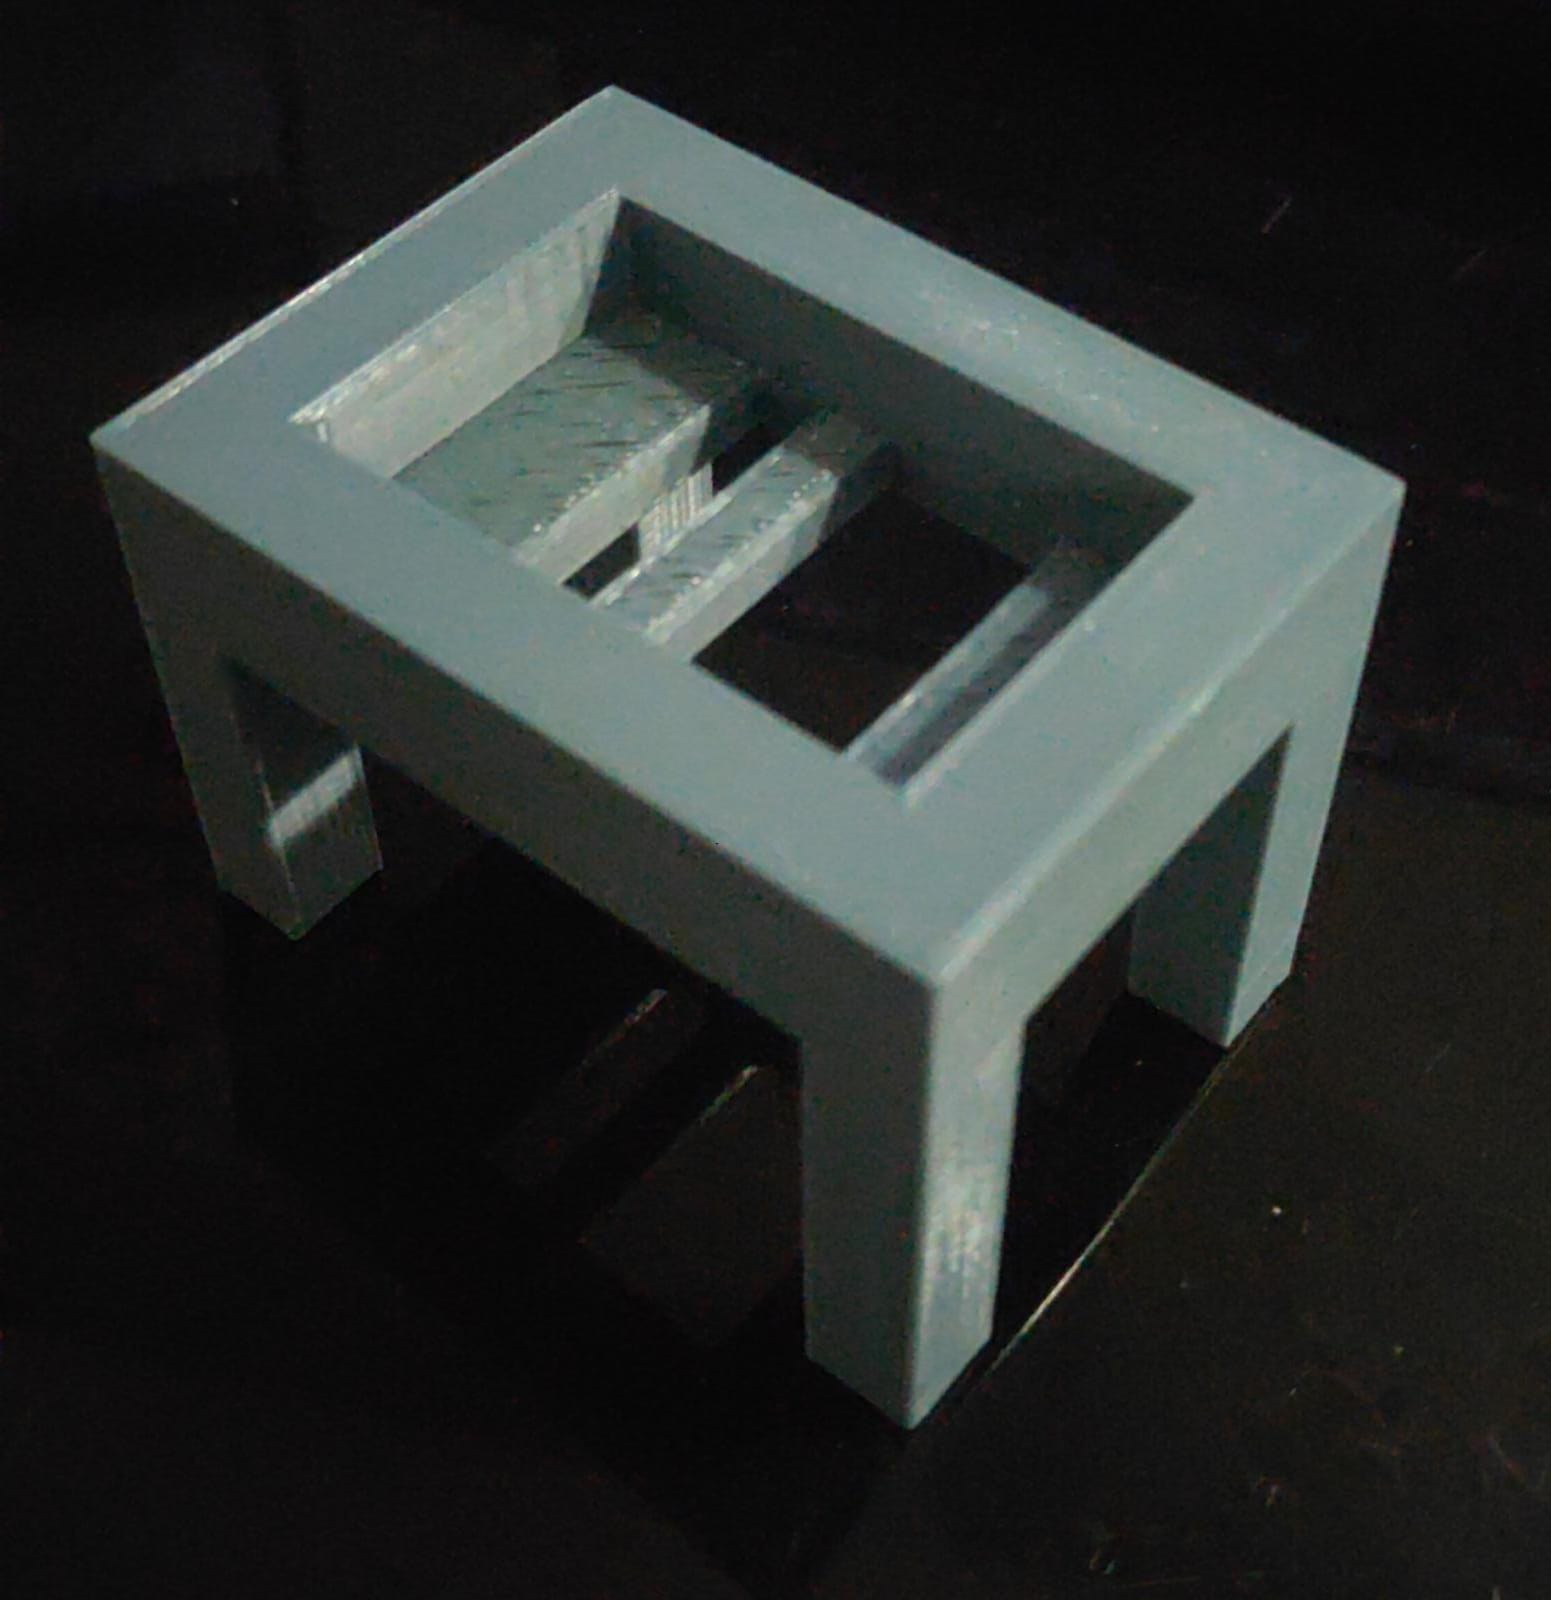
I converted the fusion360 drawing of the box into inkscape by creating a new sketch on each profile and save it as DXF
Than I transfer the dxf into inkscape
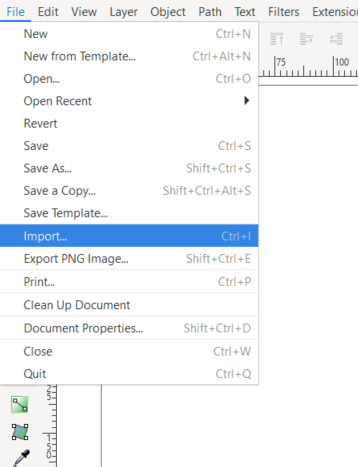
Open inkscape and go to files > import > insert dxf file
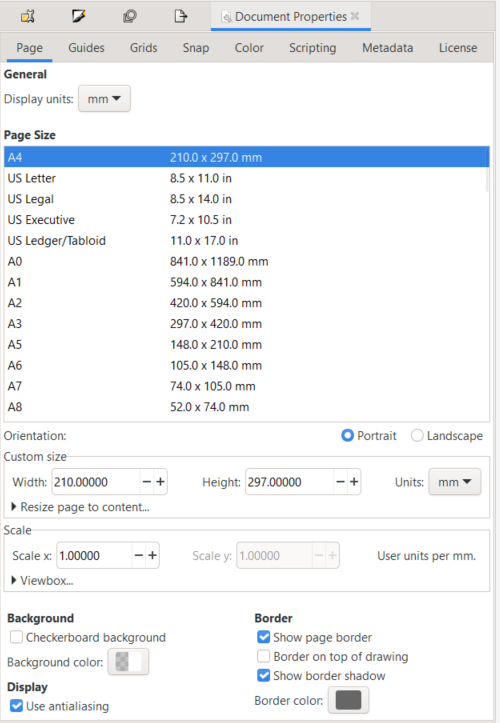
To change the canvas size fo to File > Document Properties

When laser cutting I had to try to make full use of the used pieces to recycle them so that it will not go to waste.
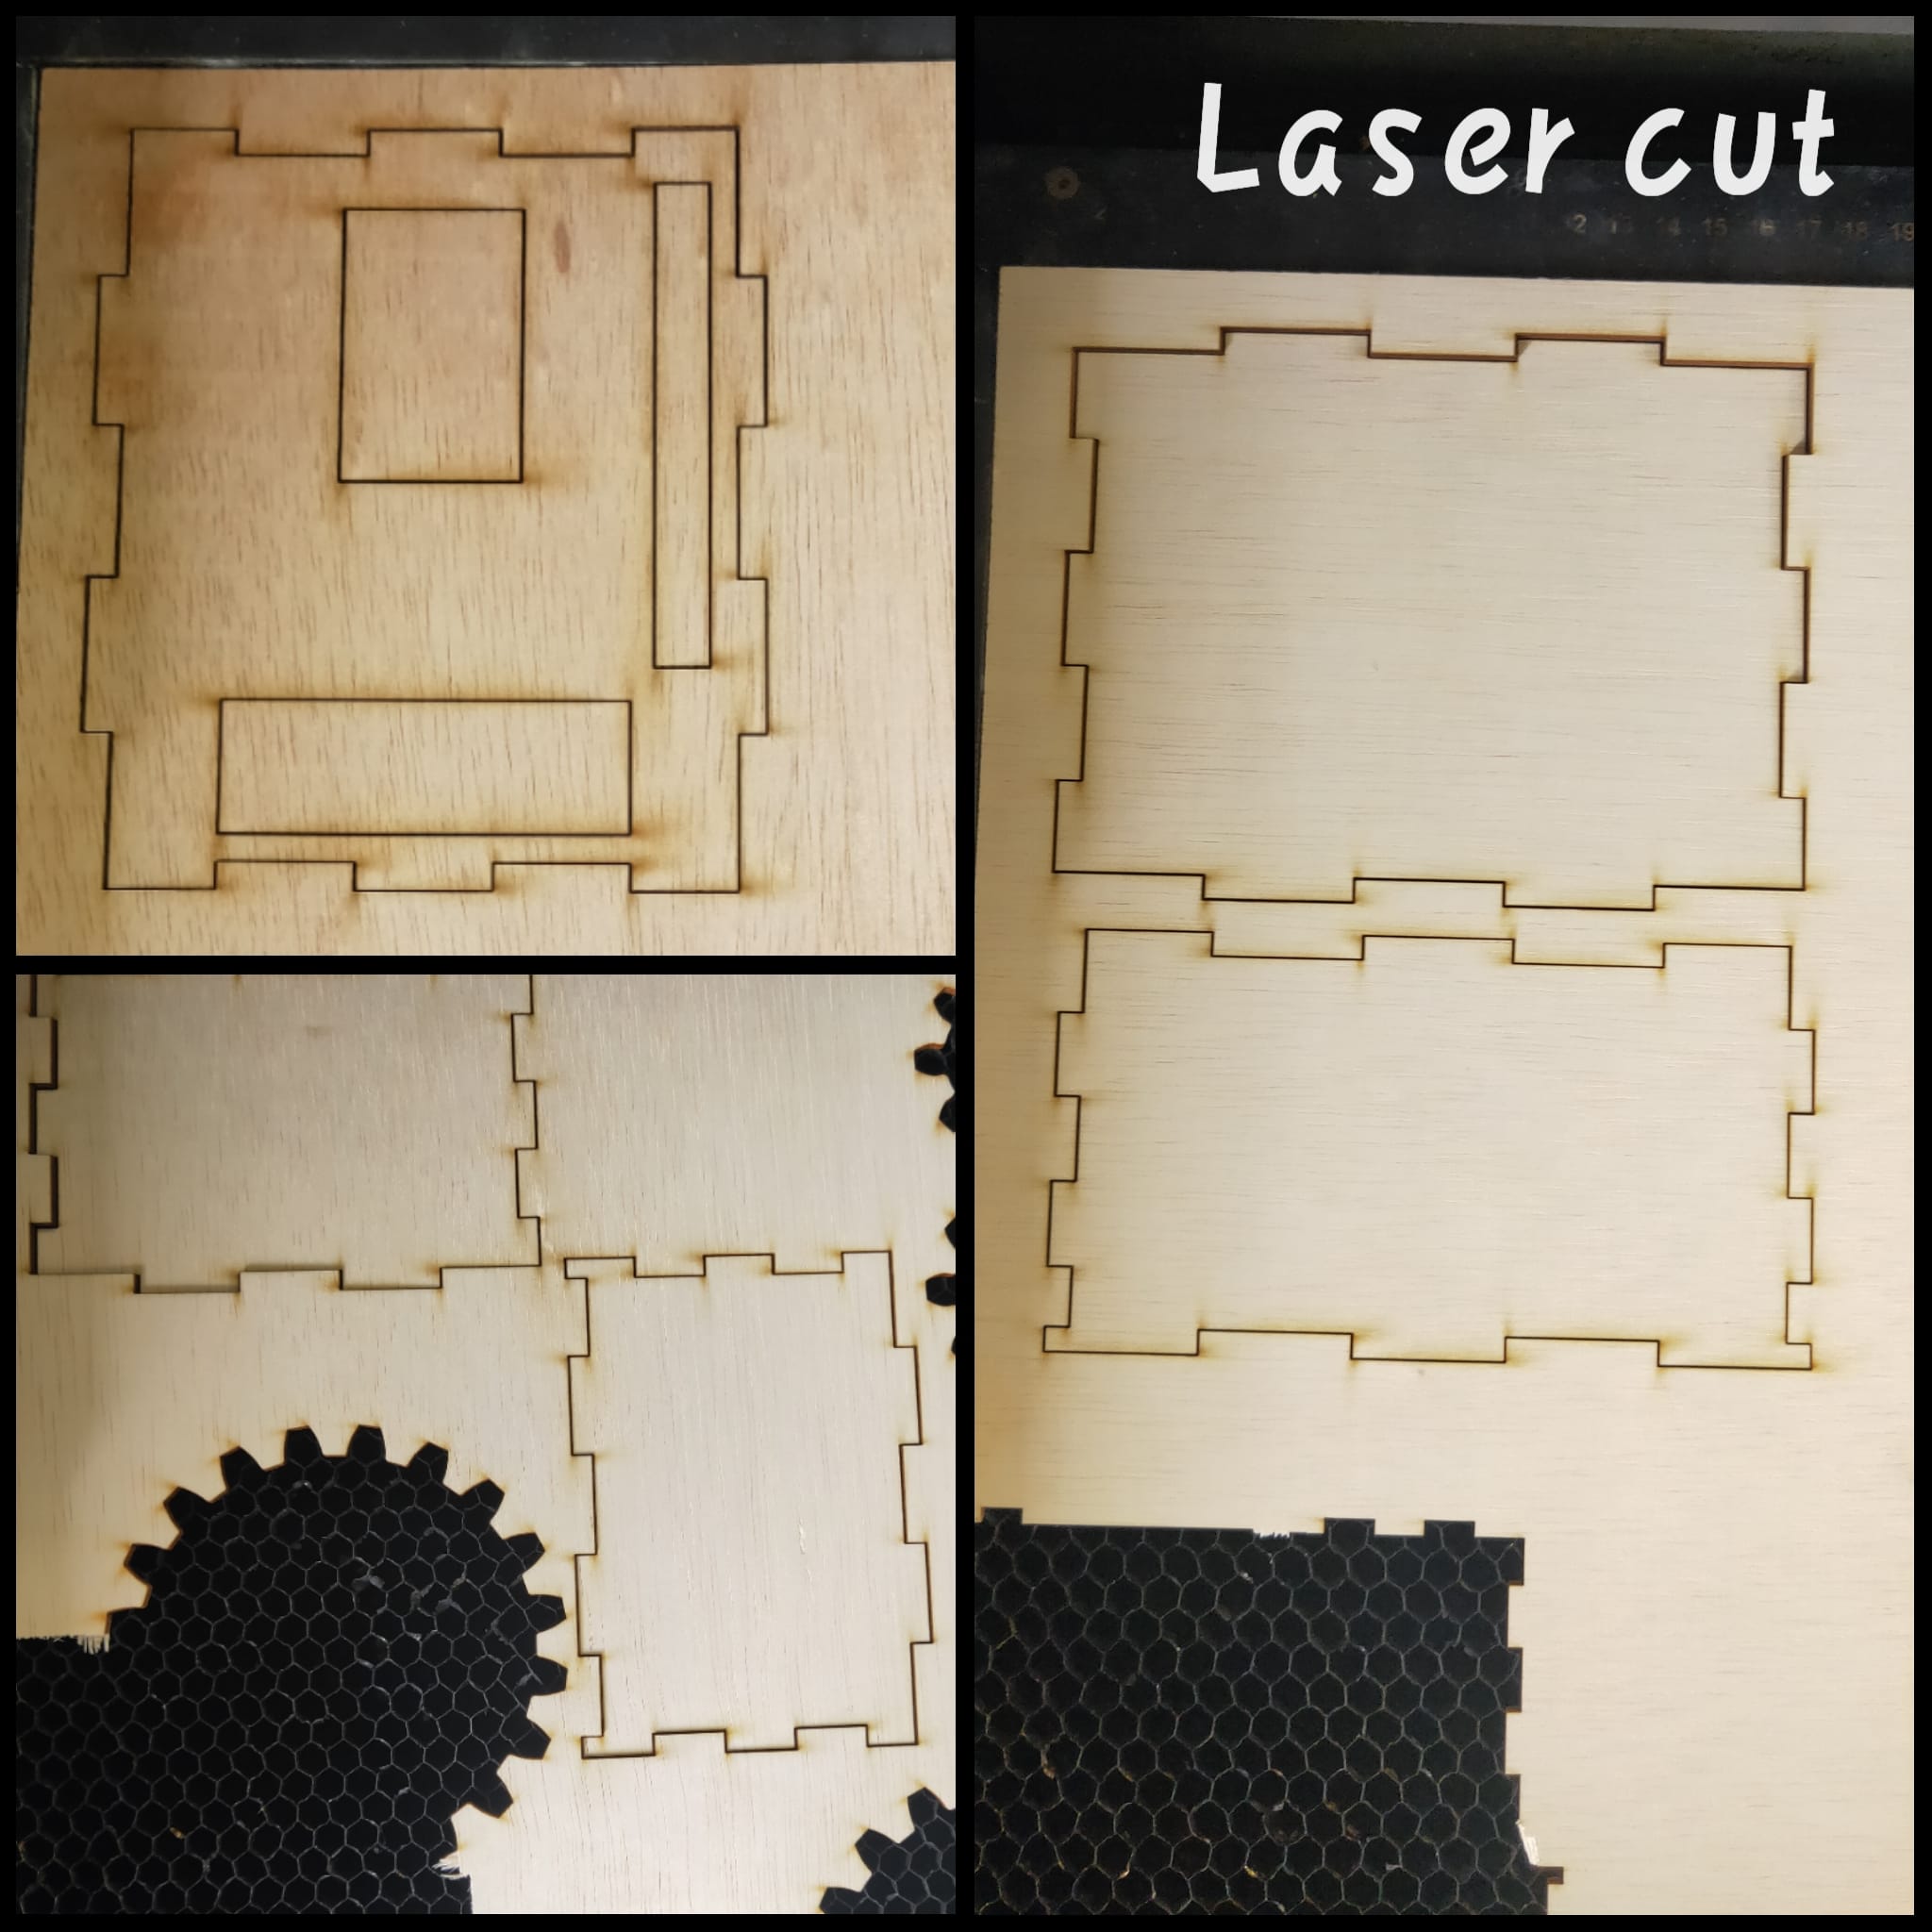
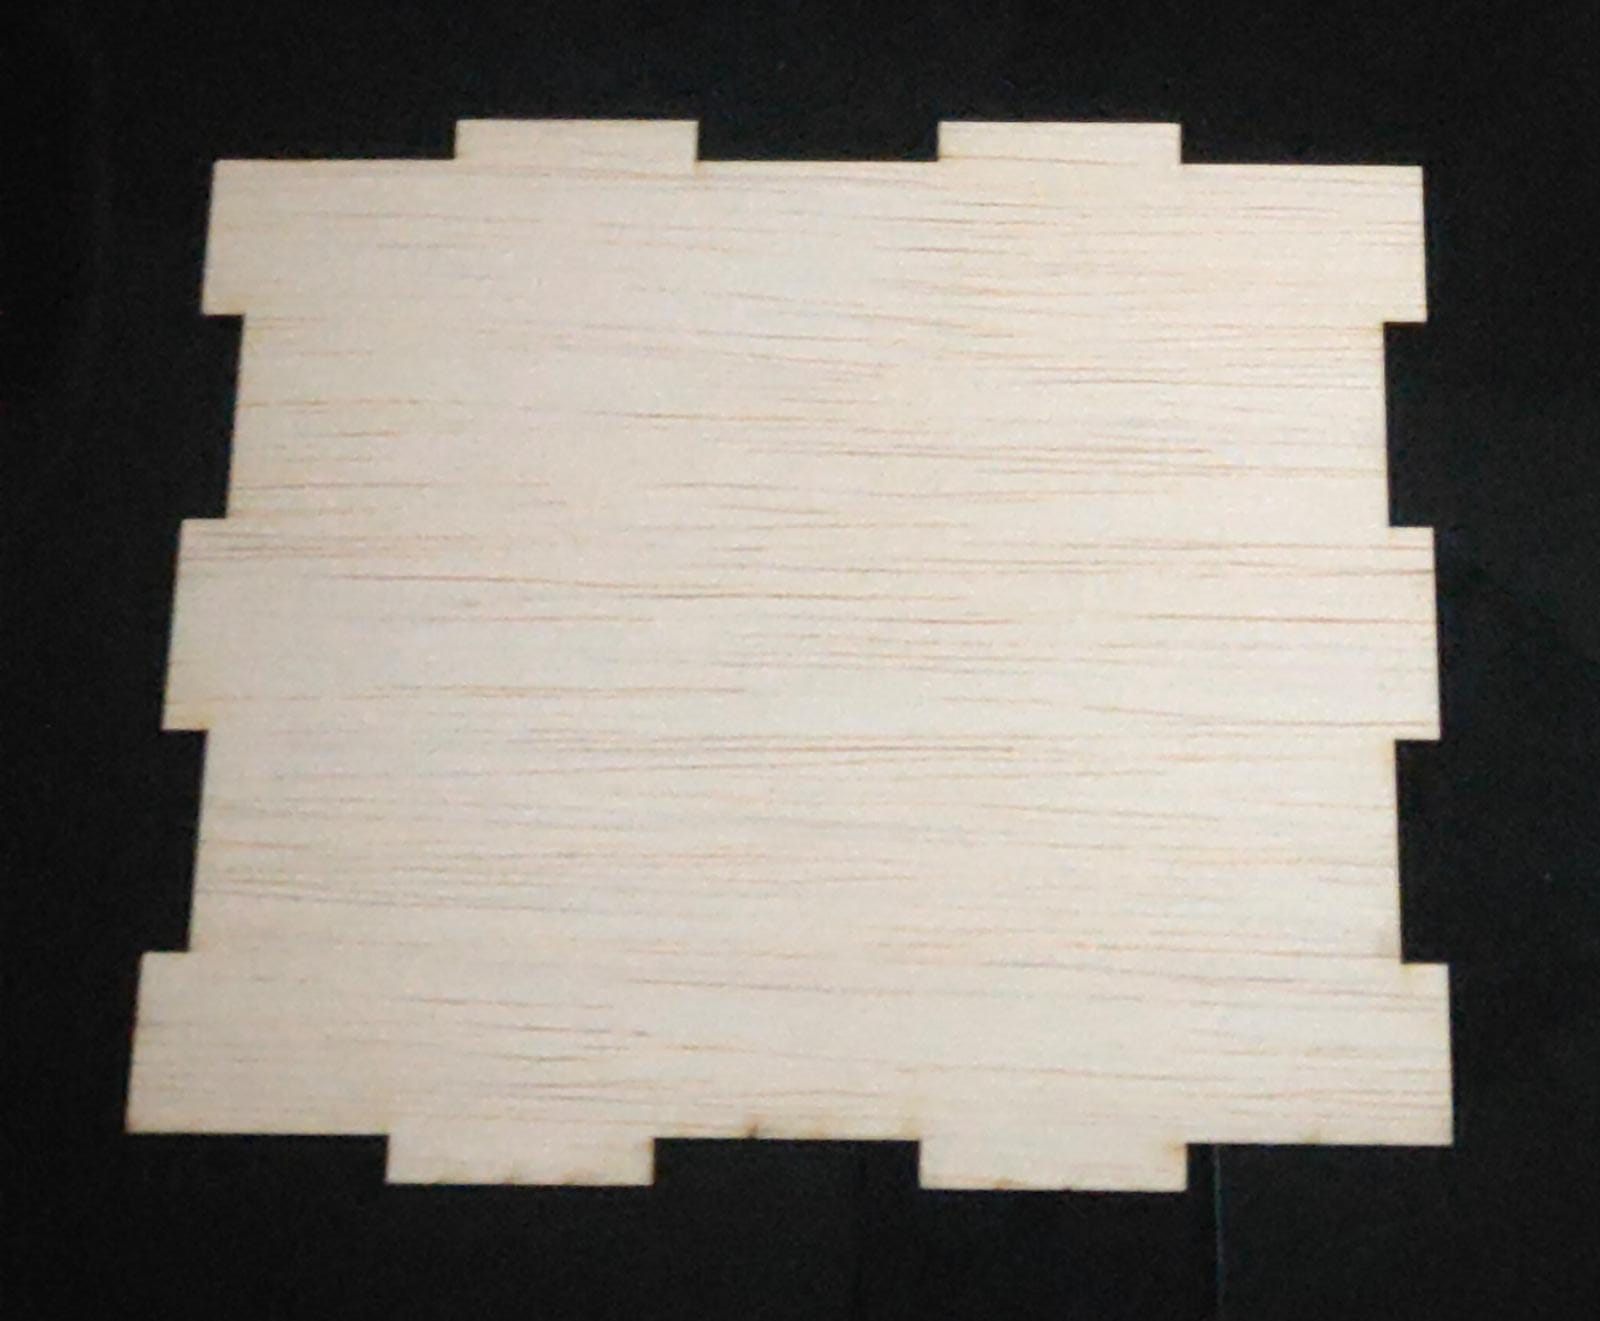
Below is a short clip of the base being cut
Below is a short clip of front and back being cut
Below is a short clip of the side being cut
Below is a short clip of the top being cut
| Name | INPUT or OUTPUT | Pin assign |
|---|---|---|
| BUTTON_G | INPUT | 2 |
| BUTTON_D | INPUT | 3 |
| BUTTON_C | INPUT | 4 |
| BUTTON_E | INPUT | 5 |
| BUTTON_F | INPUT | 6 |
| NEOPIXELS | OUTPUT | 9 |
| PIEZO | OUTPUT | 11 |
| LCD | OUTPUT | - |
All BUTTON are set to HIGH at first
            #define NOTE_B0  31
            #define NOTE_C1  33
            #define NOTE_CS1 35
            #define NOTE_D1  37
            #define NOTE_DS1 39
            #define NOTE_E1  41
            #define NOTE_F1  44
            #define NOTE_FS1 46
            #define NOTE_G1  49
            #define NOTE_GS1 52
            #define NOTE_A1  55
            #define NOTE_AS1 58
            #define NOTE_B1  62
            #define NOTE_C2  65
            #define NOTE_CS2 69
            #define NOTE_D2  73
            #define NOTE_DS2 78
            #define NOTE_E2  82
            #define NOTE_F2  87
            #define NOTE_FS2 93
            #define NOTE_G2  98
            #define NOTE_GS2 104
            #define NOTE_A2  110
            #define NOTE_AS2 117
            #define NOTE_B2  123
            #define NOTE_C3  131
            #define NOTE_CS3 139
            #define NOTE_D3  147
            #define NOTE_DS3 156
            #define NOTE_E3  165
            #define NOTE_F3  175
            #define NOTE_FS3 185
            #define NOTE_G3  196
            #define NOTE_GS3 208
            #define NOTE_A3  220
            #define NOTE_AS3 233
            #define NOTE_B3  247
            #define NOTE_C4  262
            #define NOTE_CS4 277
            #define NOTE_D4  294
            #define NOTE_DS4 311
            #define NOTE_E4  330
            #define NOTE_F4  349
            #define NOTE_FS4 370
            #define NOTE_G4  392
            #define NOTE_GS4 415
            #define NOTE_A4  440
            #define NOTE_AS4 466
            #define NOTE_B4  494
            #define NOTE_C5  523
            #define NOTE_CS5 554
            #define NOTE_D5  587
            #define NOTE_DS5 622
            #define NOTE_E5  659
            #define NOTE_F5  698
            #define NOTE_FS5 740
            #define NOTE_G5  784
            #define NOTE_GS5 831
            #define NOTE_A5  880
            #define NOTE_AS5 932
            #define NOTE_B5  988
            #define NOTE_C6  1047
            #define NOTE_CS6 1109
            #define NOTE_D6  1175
            #define NOTE_DS6 1245
            #define NOTE_E6  1319
            #define NOTE_F6  1397
            #define NOTE_FS6 1480
            #define NOTE_G6  1568
            #define NOTE_GS6 1661
            #define NOTE_A6  1760
            #define NOTE_AS6 1865
            #define NOTE_B6  1976
            #define NOTE_C7  2093
            #define NOTE_CS7 2217
            #define NOTE_D7  2349
            #define NOTE_DS7 2489
            #define NOTE_E7  2637
            #define NOTE_F7  2794
            #define NOTE_FS7 2960
            #define NOTE_G7  3136
            #define NOTE_GS7 3322
            #define NOTE_A7  3520
            #define NOTE_AS7 3729
            #define NOTE_B7  3951
            #define NOTE_C8  4186
            #define NOTE_CS8 4435
            #define NOTE_D8  4699
            #define NOTE_DS8 4978


            #define ACTIVATED LOW

            #include "Adafruit_NeoPixel.h"
            #ifdef __AVR__
            #include <avr/power.h> // Required for 16 MHz Adafruit Trinket
            #endif
            #include <Wire.h>
            #include "LiquidCrystal_I2C.h"

            LiquidCrystal_I2C lcd = LiquidCrystal_I2C(0x27, 16, 2);
            //LiquidCrystal_I2C lcd(0x38, BACKLIGHT_PIN, POSITIVE);  // Set the LCD I2C address

            const int PIEZO = 11;
            #define PIN 9
            #define NUMPIXELS 16
            Adafruit_NeoPixel pixels(NUMPIXELS, PIN, NEO_GRB + NEO_KHZ800);
            #define DELAYVAL 500

            int buttonSong = 8;
            const int BUTTON_C = 4;
            const int BUTTON_F  = 6;
            const int BUTTON_D = 3;
            const int BUTTON_G = 2;
            const int BUTTON_E = 5;

            byte Sound[8] = {
              0b00001,
              0b00011,
              0b00101,
              0b01001,
              0b01001,
              0b01011,
              0b11011,
              0b11000
            };

            void setup()
            {
              Serial.begin(9600);

              pinMode(BUTTON_C, INPUT);
              digitalWrite(BUTTON_C,HIGH);

              pinMode(BUTTON_F, INPUT);
              digitalWrite(BUTTON_F,HIGH);

              pinMode(BUTTON_D, INPUT);
              digitalWrite(BUTTON_D,HIGH);

              pinMode(BUTTON_G, INPUT);
              digitalWrite(BUTTON_G,HIGH);

              pinMode (BUTTON_E, INPUT);
              digitalWrite (BUTTON_E, HIGH);

              pinMode (buttonSong, INPUT);
              digitalWrite(buttonSong, HIGH);
              // set up the LCD's number of columns and rows:
              lcd.init();
              lcd.backlight();
              lcd.createChar(4, Sound);
              #if defined(__AVR_ATtiny85__) && (F_CPU == 16FFFFFF)
              clock_prescale_set(clock_div_1);
            #endif
              // END of Trinket-specific code.

              pixels.begin();

            }
            void loop()
            {
              lcd.setCursor(0, 0);
              lcd.write(byte(4));
              lcd.setCursor(15, 0);
              lcd.write(byte(4));
              pixels.clear();
              while(digitalRead(BUTTON_C) == ACTIVATED)//check if button is pressed
              {
                lcd.setCursor(2, 0);
                lcd.print("Note Playing");
                lcd.setCursor(8, 1);
                lcd.print("C");
                tone(PIEZO,NOTE_C4);
                for(int i=0; i<1; i++) {
                  pixels.setPixelColor(i, pixels.Color(225, 50, 0));
                  pixels.show();
                }

              }
              while(digitalRead(BUTTON_F) == ACTIVATED)
              {
                lcd.setCursor(2, 0);
                lcd.print("Note Playing");
                lcd.setCursor(8, 1);
                lcd.print("F");
                tone(PIEZO,NOTE_F4 );
                for(int i=0; i<4; i++) {
                  pixels.setPixelColor(i, pixels.Color(225, 225, 0));
                  pixels.show();
                }

              }

              while(digitalRead(BUTTON_D) == ACTIVATED)
              {
                lcd.setCursor(2, 0);
                lcd.print("Note Playing");
                lcd.setCursor(8, 1);
                lcd.print("D");
                tone(PIEZO,NOTE_D4);
                for(int i=0; i<2; i++) {
                  pixels.setPixelColor(i, pixels.Color(128, 32, 117));
                  pixels.show();
                }

              }

              while(digitalRead(BUTTON_G) == ACTIVATED)
              {
                lcd.setCursor(2, 0);
                lcd.print("Note Playing");
                lcd.setCursor(8, 1);
                lcd.print("G");
                tone(PIEZO,NOTE_G4);
                for(int i=0; i<5; i++) {
                  pixels.setPixelColor(i, pixels.Color(0, 187, 30));
                  pixels.show();
                }

              }
               while(digitalRead(BUTTON_E) == ACTIVATED)
              {
                lcd.setCursor(2, 0);
                lcd.print("Note Playing");
                lcd.setCursor(8, 1);
                lcd.print("E");
                tone(PIEZO,NOTE_E4);
                for(int i=0; i<3 ; i++) {
                  pixels.setPixelColor(i, pixels.Color(0, 150, 150));
                  pixels.show();
                }

              }

              noTone(PIEZO);

            }
One interesting factor this prouct gives is that if the user do not want to play musical notes he/she can change it so that it can play music. Hence this can turn into a 2 in 1 product.
Below is a code that includes songs like:
1. Starwars
2. Pirate of the caribbean
3. unravel
The user can press the middle button to stop the music and change song.
#define NOTE_B0 31
#define NOTE_C1 33
#define NOTE_CS1 35
#define NOTE_D1 37
#define NOTE_DS1 39
#define NOTE_E1 41
#define NOTE_F1 44
#define NOTE_FS1 46
#define NOTE_G1 49
#define NOTE_GS1 52
#define NOTE_A1 55
#define NOTE_AS1 58
#define NOTE_B1 62
#define NOTE_C2 65
#define NOTE_CS2 69
#define NOTE_D2 73
#define NOTE_DS2 78
#define NOTE_E2 82
#define NOTE_F2 87
#define NOTE_FS2 93
#define NOTE_G2 98
#define NOTE_GS2 104
#define NOTE_A2 110
#define NOTE_AS2 117
#define NOTE_B2 123
#define NOTE_C3 131
#define NOTE_CS3 139
#define NOTE_D3 147
#define NOTE_DS3 156
#define NOTE_E3 165
#define NOTE_F3 175
#define NOTE_FS3 185
#define NOTE_G3 196
#define NOTE_GS3 208
#define NOTE_A3 220
#define NOTE_AS3 233
#define NOTE_B3 247
#define NOTE_C4 262
#define NOTE_CS4 277
#define NOTE_D4 294
#define NOTE_DS4 311
#define NOTE_E4 330
#define NOTE_F4 349
#define NOTE_FS4 370
#define NOTE_G4 392
#define NOTE_GS4 415
#define NOTE_A4 440
#define NOTE_AS4 466
#define NOTE_B4 494
#define NOTE_C5 523
#define NOTE_CS5 554
#define NOTE_D5 587
#define NOTE_DS5 622
#define NOTE_E5 659
#define NOTE_F5 698
#define NOTE_FS5 740
#define NOTE_G5 784
#define NOTE_GS5 831
#define NOTE_A5 880
#define NOTE_AS5 932
#define NOTE_B5 988
#define NOTE_C6 1047
#define NOTE_CS6 1109
#define NOTE_D6 1175
#define NOTE_DS6 1245
#define NOTE_E6 1319
#define NOTE_F6 1397
#define NOTE_FS6 1480
#define NOTE_G6 1568
#define NOTE_GS6 1661
#define NOTE_A6 1760
#define NOTE_AS6 1865
#define NOTE_B6 1976
#define NOTE_C7 2093
#define NOTE_CS7 2217
#define NOTE_D7 2349
#define NOTE_DS7 2489
#define NOTE_E7 2637
#define NOTE_F7 2794
#define NOTE_FS7 2960
#define NOTE_G7 3136
#define NOTE_GS7 3322
#define NOTE_A7 3520
#define NOTE_AS7 3729
#define NOTE_B7 3951
#define NOTE_C8 4186
#define NOTE_CS8 4435
#define NOTE_D8 4699
#define NOTE_DS8 4978
#define ACTIVATED LOW
#include "Adafruit_NeoPixel.h"
#ifdef __AVR__
#include <avr/power.h> // Required for 16 MHz Adafruit Trinket
#endif
#include <Wire.h>
#include "LiquidCrystal_I2C.h"
LiquidCrystal_I2C lcd = LiquidCrystal_I2C(0x27, 16, 2);
//LiquidCrystal_I2C lcd(0x38, BACKLIGHT_PIN, POSITIVE); // Set the LCD I2C address
const int PIEZO = 11;
#define PIN 9
#define NUMPIXELS 16
Adafruit_NeoPixel pixels(NUMPIXELS, PIN, NEO_GRB + NEO_KHZ800);
#define DELAYVAL 500
const int c = 261;
const int d = 294;
const int e = 329;
const int f = 349;
const int g = 391;
const int gS = 415;
const int a = 440;
const int aS = 456;
const int b = 494;
const int cH = 523;
const int cSH = 554;
const int dH = 587;
const int dSH = 622;
const int eH = 659;
const int fH = 698;
const int fSH = 740;
const int gH = 784;
const int gSH = 830;
const int aH = 880;
int buttonSong = 8;
const int BUTTON_C = 4;
const int BUTTON_F = 6;
const int BUTTON_D = 3;
const int BUTTON_G = 2;
const int BUTTON_E = 5;
byte Sound[8] = {
0b00001,
0b00011,
0b00101,
0b01001,
0b01001,
0b01011,
0b11011,
0b11000
};
const int buzzerPin = 11;
int counter = 0;
int s = 0;
void setup()
{
Serial.begin(9600);
pinMode(BUTTON_C, INPUT);
digitalWrite(BUTTON_C,HIGH);
pinMode(BUTTON_F, INPUT);
digitalWrite(BUTTON_F,HIGH);
pinMode(BUTTON_D, INPUT);
digitalWrite(BUTTON_D,HIGH);
pinMode(BUTTON_G, INPUT);
digitalWrite(BUTTON_G,HIGH);
pinMode (BUTTON_E, INPUT);
digitalWrite (BUTTON_E, HIGH);
pinMode(buzzerPin, OUTPUT);
// set up the LCD's number of columns and rows:
lcd.init();
lcd.backlight();
lcd.createChar(4, Sound);
#if defined(__AVR_ATtiny85__) && (F_CPU == 16FFFFFF)
clock_prescale_set(clock_div_1);
#endif
// END of Trinket-specific code.
pixels.begin();
}
// notes in the melody:
int melody[] = {
NOTE_AS4, NOTE_C5, NOTE_AS4, NOTE_A4, NOTE_G4, NOTE_C5, NOTE_AS4, NOTE_A4, NOTE_G4, NOTE_G4, NOTE_F4, 0, 0,
NOTE_DS4, NOTE_DS4, NOTE_F4, NOTE_D4, 0, 0, 0, NOTE_D4, NOTE_D4, NOTE_D4, NOTE_D4, NOTE_D5, NOTE_D5,
NOTE_G3, NOTE_AS3, NOTE_C4, NOTE_G3, NOTE_G3, NOTE_AS3, NOTE_AS4, NOTE_A4, NOTE_A4, NOTE_A4, NOTE_AS4, NOTE_AS4,
NOTE_G3, NOTE_AS3, NOTE_C4, NOTE_G3, NOTE_G3, NOTE_AS3,
};
int melody2[] = {
// Jigglypuff's Song
NOTE_D5,-4, NOTE_A5,8, NOTE_FS5,8, NOTE_D5,8,
NOTE_E5,-4, NOTE_FS5,8, NOTE_G5,4,
NOTE_FS5,-4, NOTE_E5,8, NOTE_FS5,4,
NOTE_D5,-2,
NOTE_D5,-4, NOTE_A5,8, NOTE_FS5,8, NOTE_D5,8,
NOTE_E5,-4, NOTE_FS5,8, NOTE_G5,4,
NOTE_FS5,-1,
NOTE_D5,-4, NOTE_A5,8, NOTE_FS5,8, NOTE_D5,8,
NOTE_E5,-4, NOTE_FS5,8, NOTE_G5,4,
NOTE_FS5,-4, NOTE_E5,8, NOTE_FS5,4,
NOTE_D5,-2,
NOTE_D5,-4, NOTE_A5,8, NOTE_FS5,8, NOTE_D5,8,
NOTE_E5,-4, NOTE_FS5,8, NOTE_G5,4,
NOTE_FS5,-1,
};
int notes[] = {
NOTE_E4, NOTE_G4, NOTE_A4, NOTE_A4, 0,
NOTE_A4, NOTE_B4, NOTE_C5, NOTE_C5, 0,
NOTE_C5, NOTE_D5, NOTE_B4, NOTE_B4, 0,
NOTE_A4, NOTE_G4, NOTE_A4, 0,
NOTE_E4, NOTE_G4, NOTE_A4, NOTE_A4, 0,
NOTE_A4, NOTE_B4, NOTE_C5, NOTE_C5, 0,
NOTE_C5, NOTE_D5, NOTE_B4, NOTE_B4, 0,
NOTE_A4, NOTE_G4, NOTE_A4, 0,
NOTE_E4, NOTE_G4, NOTE_A4, NOTE_A4, 0,
NOTE_A4, NOTE_C5, NOTE_D5, NOTE_D5, 0,
NOTE_D5, NOTE_E5, NOTE_F5, NOTE_F5, 0,
NOTE_E5, NOTE_D5, NOTE_E5, NOTE_A4, 0,
NOTE_A4, NOTE_B4, NOTE_C5, NOTE_C5, 0,
NOTE_D5, NOTE_E5, NOTE_A4, 0,
NOTE_A4, NOTE_C5, NOTE_B4, NOTE_B4, 0,
NOTE_C5, NOTE_A4, NOTE_B4, 0,
NOTE_A4, NOTE_A4,
};
int noteDurations[] = {
4.5, 2.25, 2.25, 4.5, 2.25, 2.25, 2.25, 2.25, 2.25, 4.5, 3, 9, 4.5,
4.5, 2.25, 4.5, 2.25, 1.125, 2.25, 4.5, 4.5, 2.25, 4.5, 2.25, 4.5, 2.25,
4.5, 4.5, 4.5, 2.25, 4.5, 4.5, 4.5, 2.25, 4.5, 2.25, 4.5, 2,
4.5, 4.5, 4.5, 2.25, 4.5, 4.5,
};
int durations[] = {
125, 125, 250, 125, 125,
125, 125, 250, 125, 125,
125, 125, 250, 125, 125,
125, 125, 375, 125,
125, 125, 250, 125, 125,
125, 125, 250, 125, 125,
125, 125, 250, 125, 125,
125, 125, 375, 125,
125, 125, 250, 125, 125,
125, 125, 250, 125, 125,
125, 125, 250, 125, 125,
125, 125, 125, 250, 125,
125, 125, 250, 125, 125,
250, 125, 250, 125,
125, 125, 250, 125, 125,
125, 125, 375, 375,
250, 125,};
void beep(int note1, int duration1)
{
tone(buzzerPin, note1, duration1);
if(counter % 2 == 0)
{
delay(duration1);
}
else
{
delay(duration1);
}
//Stop tone on buzzerPin
noTone(buzzerPin);
delay(50);
//Increment counter
counter++;
}
void firstSection()
{
beep(a, 500);
beep(a, 500);
beep(a, 500);
beep(f, 350);
beep(cH, 150);
beep(a, 500);
beep(f, 350);
beep(cH, 150);
beep(a, 650);
delay(500);
beep(eH, 500);
beep(eH, 500);
beep(eH, 500);
beep(fH, 350);
beep(cH, 150);
beep(gS, 500);
beep(f, 350);
beep(cH, 150);
beep(a, 650);
delay(500);
}
void secondSection()
{
beep(aH, 500);
beep(a, 300);
beep(a, 150);
beep(aH, 500);
beep(gSH, 325);
beep(gH, 175);
beep(fSH, 125);
beep(fH, 125);
beep(fSH, 250);
delay(325);
beep(aS, 250);
beep(dSH, 500);
beep(dH, 325);
beep(cSH, 175);
beep(cH, 125);
beep(b, 125);
beep(cH, 250);
delay(350);
}
void loop()
{
lcd.setCursor(0, 0);
lcd.write(byte(4));
lcd.setCursor(15, 0);
lcd.write(byte(4));
pixels.clear();
while(digitalRead(BUTTON_C) == ACTIVATED)
{
lcd.clear();
lcd.setCursor(4, 0);
lcd.print("Minions");
for(int i=0; i<1; i++) {
pixels.setPixelColor(i, pixels.Color(225, 50, 0));
pixels.show();
}
if (analogRead(A0) > 1000) {
tone(11, 740, 200);
delay(100);
}
if (analogRead(A1) > 1000) {
tone(11, 831, 200);
delay(100);
}
if (analogRead(A2) > 1000) {
tone(11, 880, 200);
delay(100);
}
if (analogRead(A3) > 1000) {
tone(11, 587, 200);
delay(100);
}
if (analogRead(A4) > 1000) {
tone(11, 554, 200);
delay(100);
}
if (analogRead(A5) > 1000) {
tone(11, 659, 200);
delay(100);
}
}
while(digitalRead(BUTTON_F) == ACTIVATED)
{
lcd.clear();
lcd.setCursor(4, 0);
lcd.print("Starwars");
for(int i=0; i<5; i++) {
pixels.setPixelColor(i, pixels.Color(250, 150, 150));
pixels.show();
}
for(int a=0; a<1; a++){
if (digitalRead(BUTTON_D) == ACTIVATED){
noTone(PIEZO);
break;
}
firstSection();
secondSection();
}
}
while(digitalRead(BUTTON_D) == ACTIVATED)
{
lcd.clear();
lcd.setCursor(3, 0);
lcd.print("More songs");
lcd.setCursor(5, 1);
lcd.print("coming");
}
while(digitalRead(BUTTON_G) == ACTIVATED)
{
lcd.clear();
lcd.setCursor(2, 0);
lcd.print("Pirate of the");
lcd.setCursor(4, 1);
lcd.print("Caribbean");
for(int i=0; i<5; i++) {
pixels.setPixelColor(i, pixels.Color(0, 150, 150));
pixels.show();
}
const float songSpeed = 1.0;
const int buzzer = 11;
const int totalNotes = sizeof(notes) / sizeof(int);
for (int i = 0; i < totalNotes; i++)
{
const int currentNote = notes[i];
float wait = durations[i] / songSpeed;
tone(buzzer, notes[i], wait); // tone(pin, frequency, duration)
if (currentNote != 0)
{
tone(buzzer, notes[i], wait); // tone(pin, frequency, duration)
}
else if (digitalRead(BUTTON_D) == ACTIVATED){
noTone(PIEZO);
break;
}
else
{
noTone(buzzer);
}
// delay is used to wait for tone to finish playing before moving to next loop
delay(wait);
}
}
while(digitalRead(BUTTON_E) == ACTIVATED)
{
lcd.clear();
lcd.setCursor(4, 0);
lcd.print("Unravel");
for(int i=0; i<5 ; i++) {
pixels.setPixelColor(i, pixels.Color(88, 88, 88));
pixels.show();
}
if (digitalRead(BUTTON_D) == ACTIVATED){
noTone(PIEZO);
break;}
for (int thisNote=0; thisNote <85; thisNote++) {
int noteDuration = 600 / noteDurations[thisNote];
tone(11, melody[thisNote], noteDuration);
int pauseBetweenNotes = noteDuration * 1.50;
delay(pauseBetweenNotes);
noTone(11);
if (digitalRead(BUTTON_D) == ACTIVATED){
noTone(PIEZO);
break;
}
}
}
noTone(PIEZO);
}
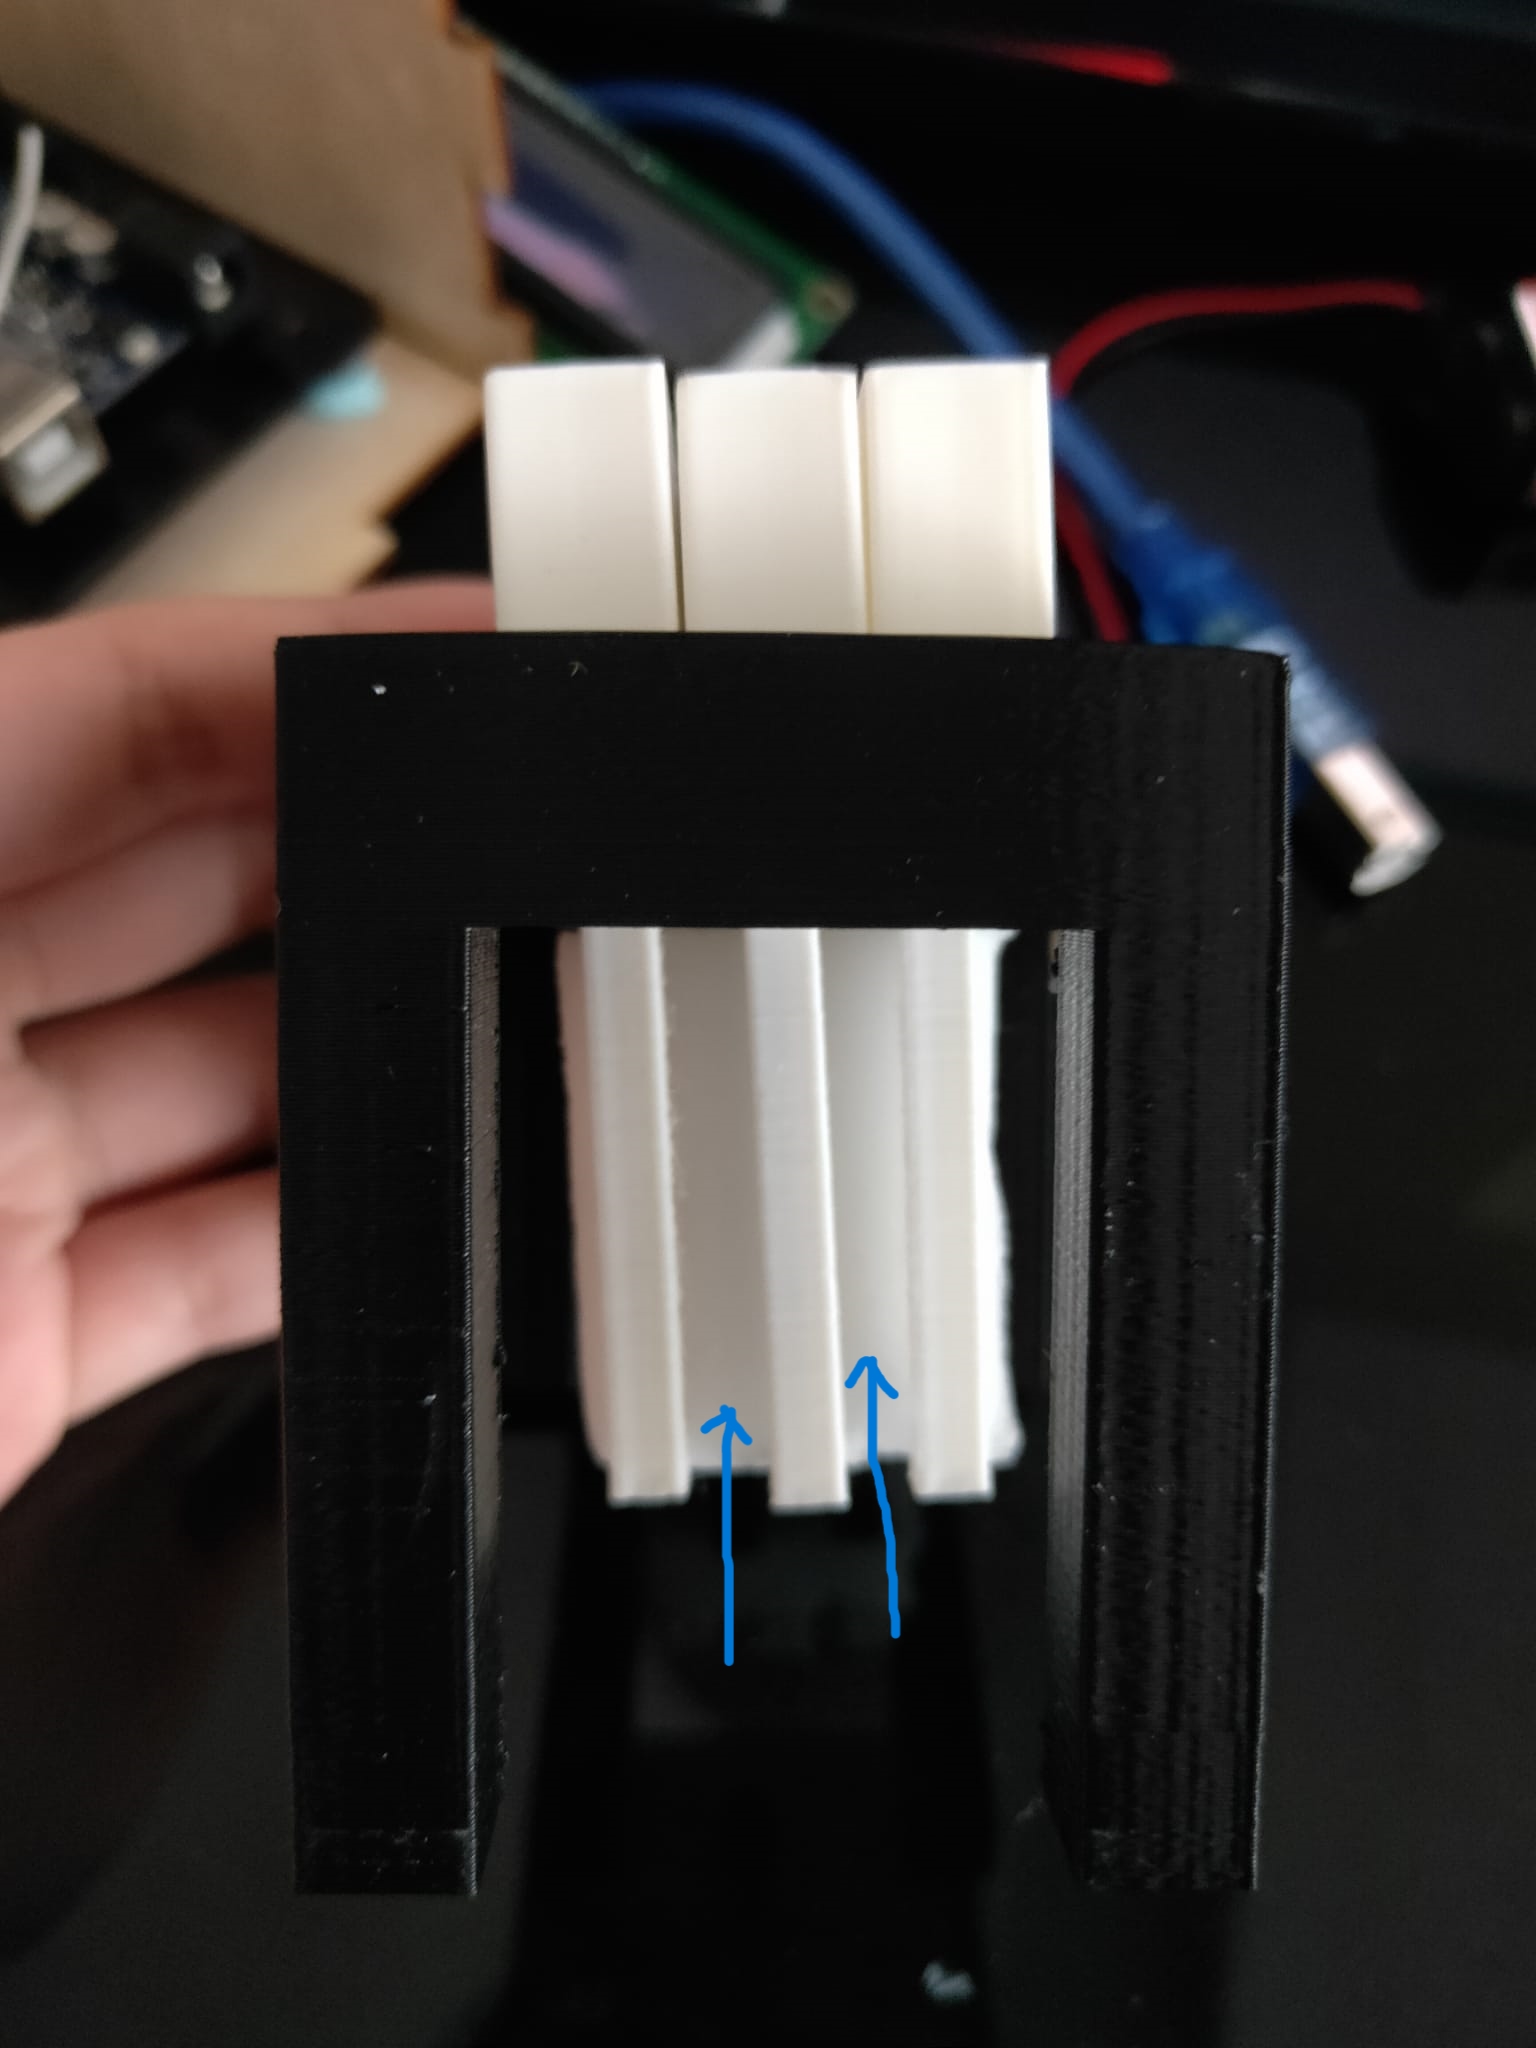
First I assemble all the tiles into the keyholder.
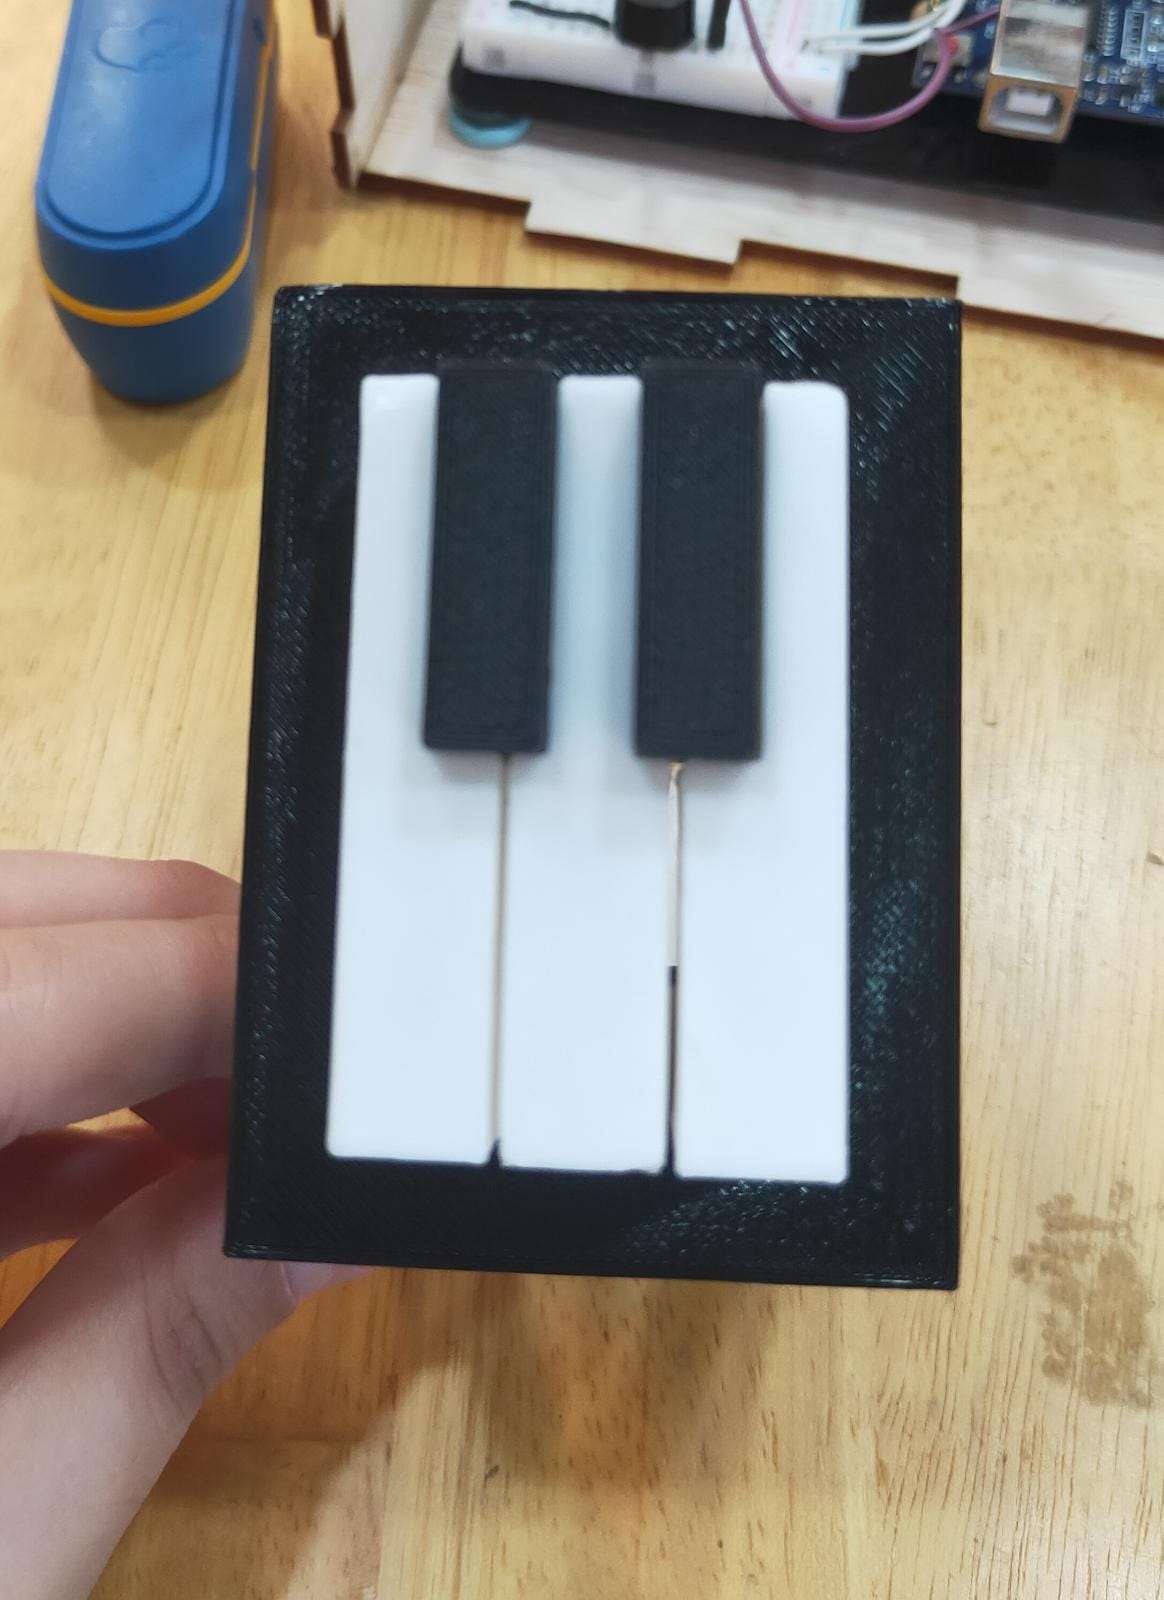
I had to slot a sponge between the white and black tiles so it will not touch each other. (Blue arrows)
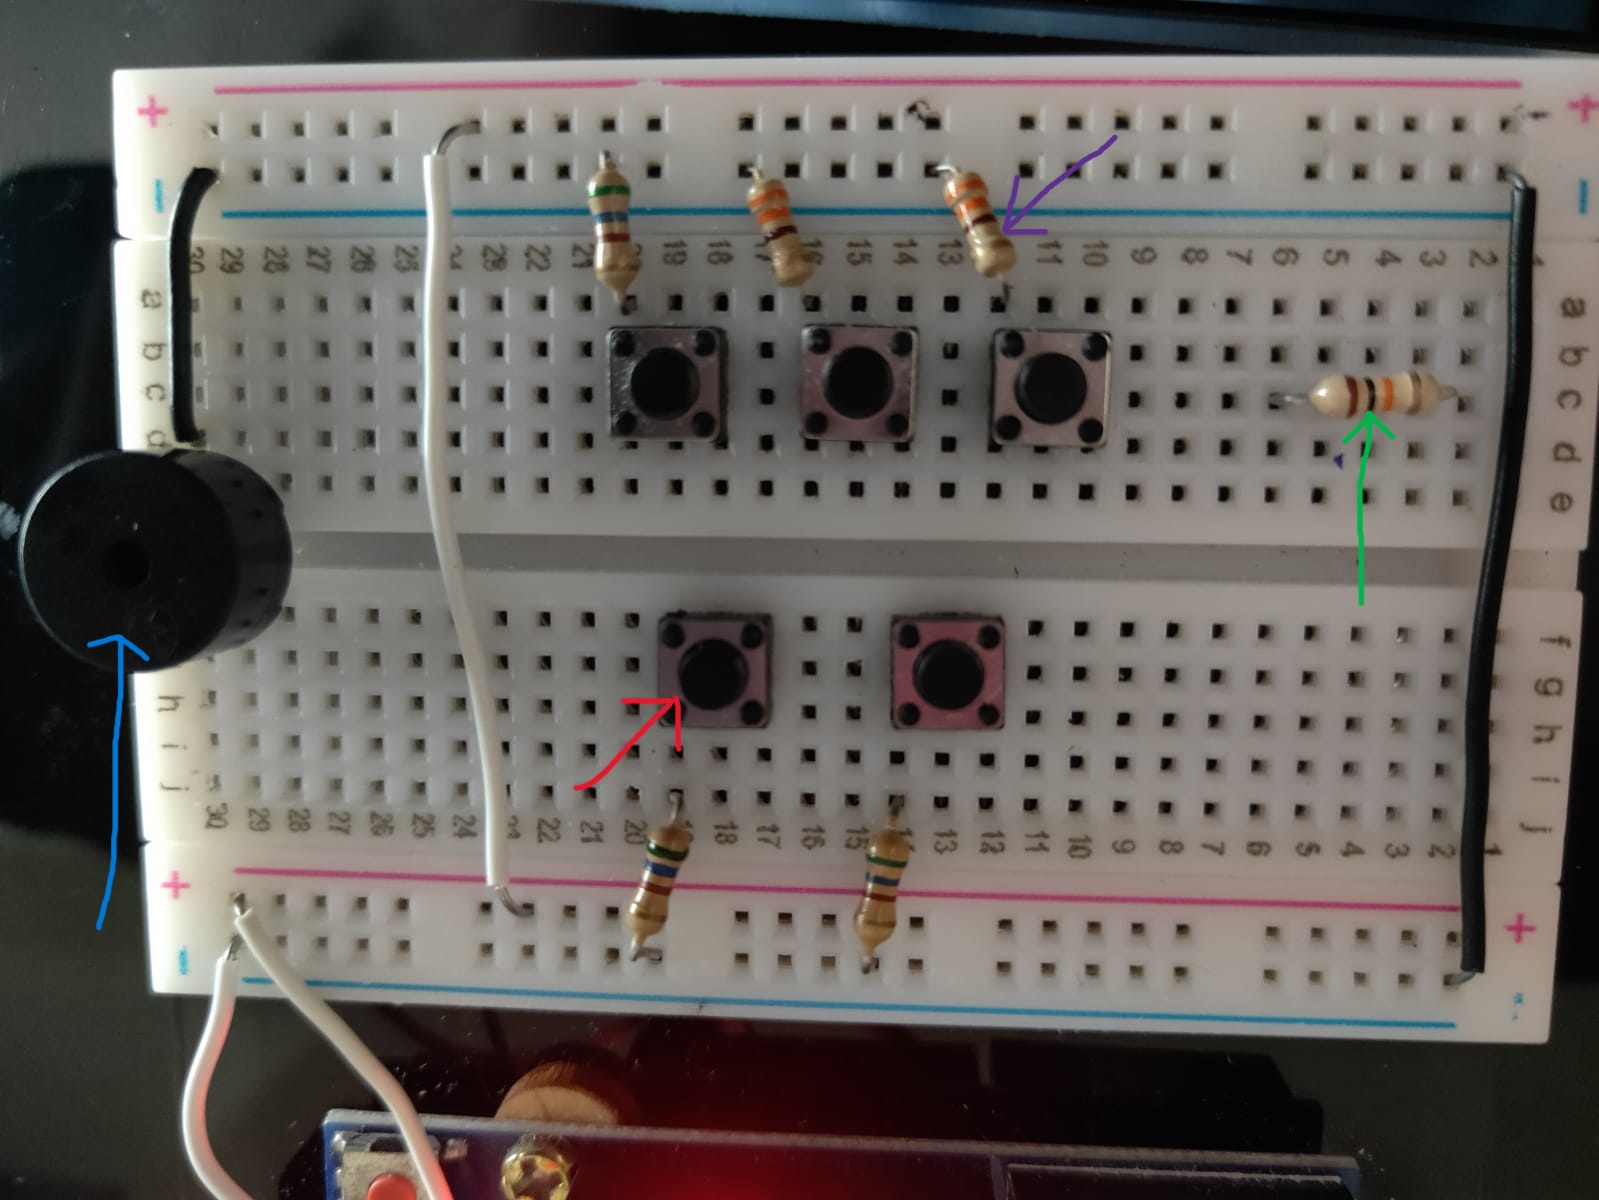
Than I put the arduino board and connect the circuit.
| Color | What is it for? |
|---|---|
| Blue | Buzzer: to play the notes when push button is pressed |
| Red | Push button : Act as my input device |
| Green | 1k ohm resistor for the neopixel |
| Purple | Resistor for push button (560ohm and 330ohm) |
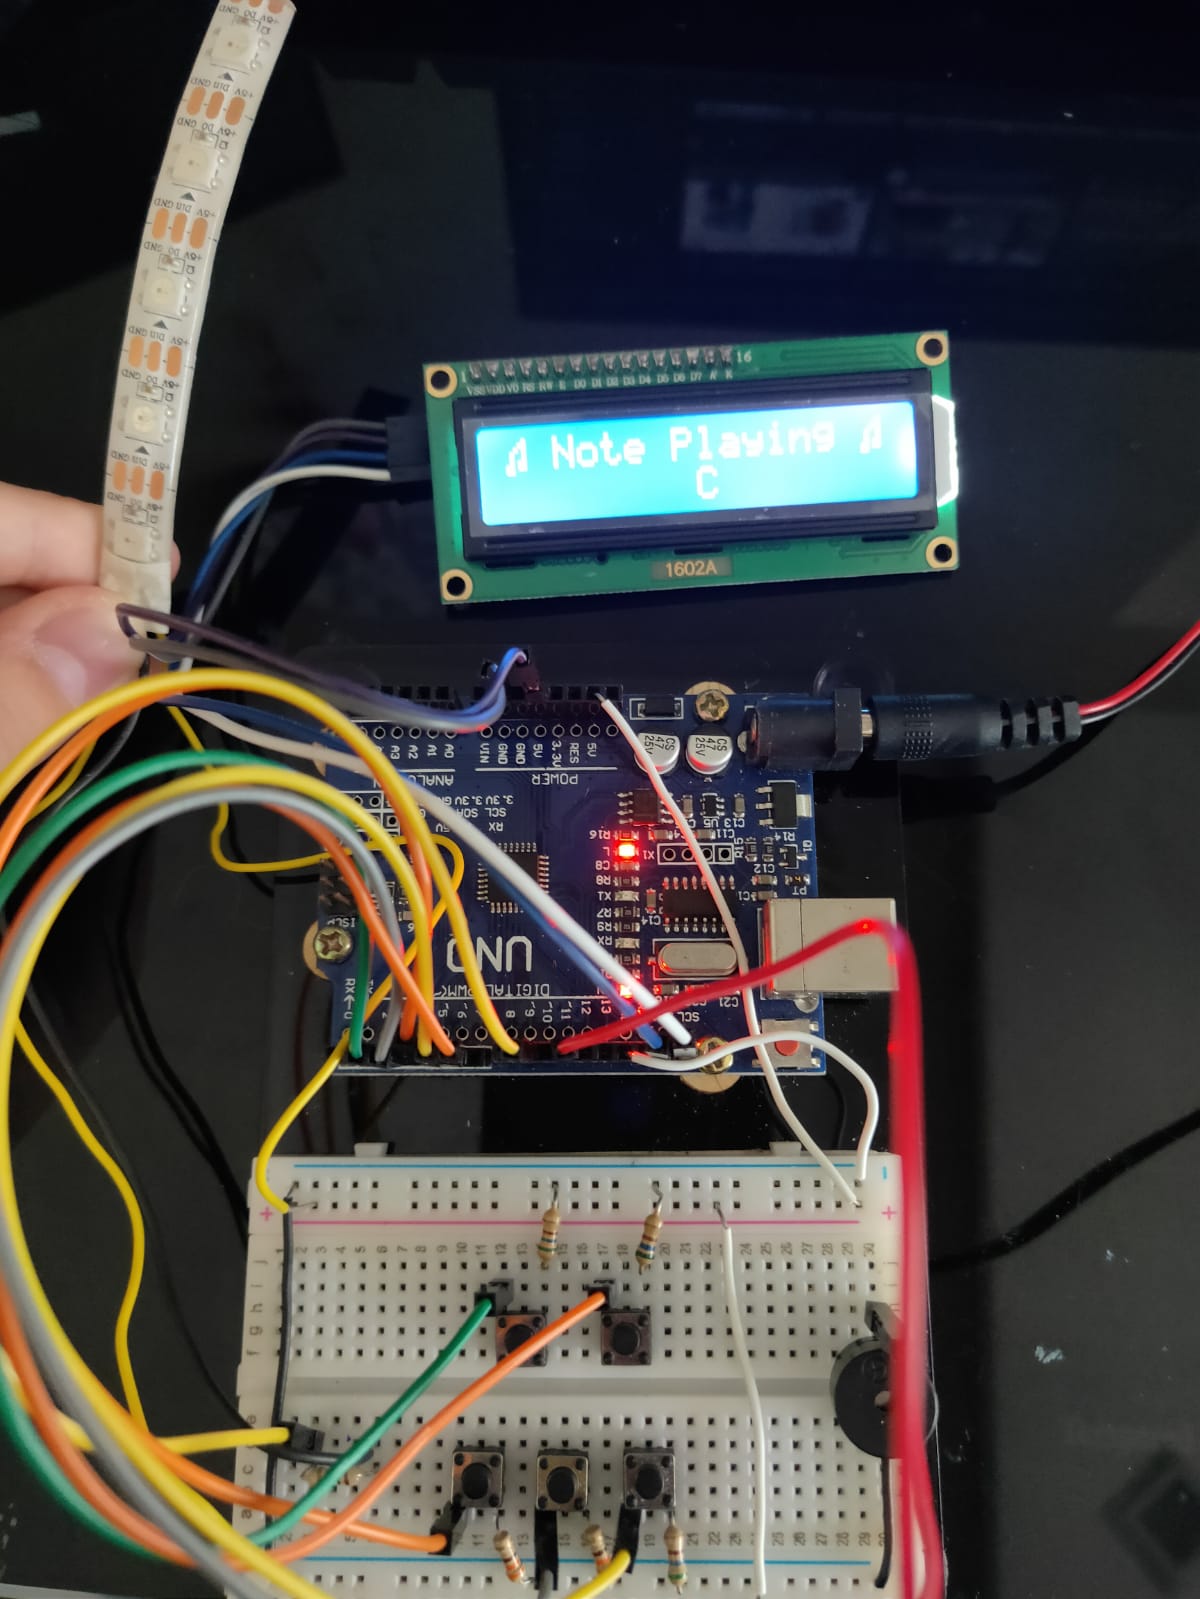
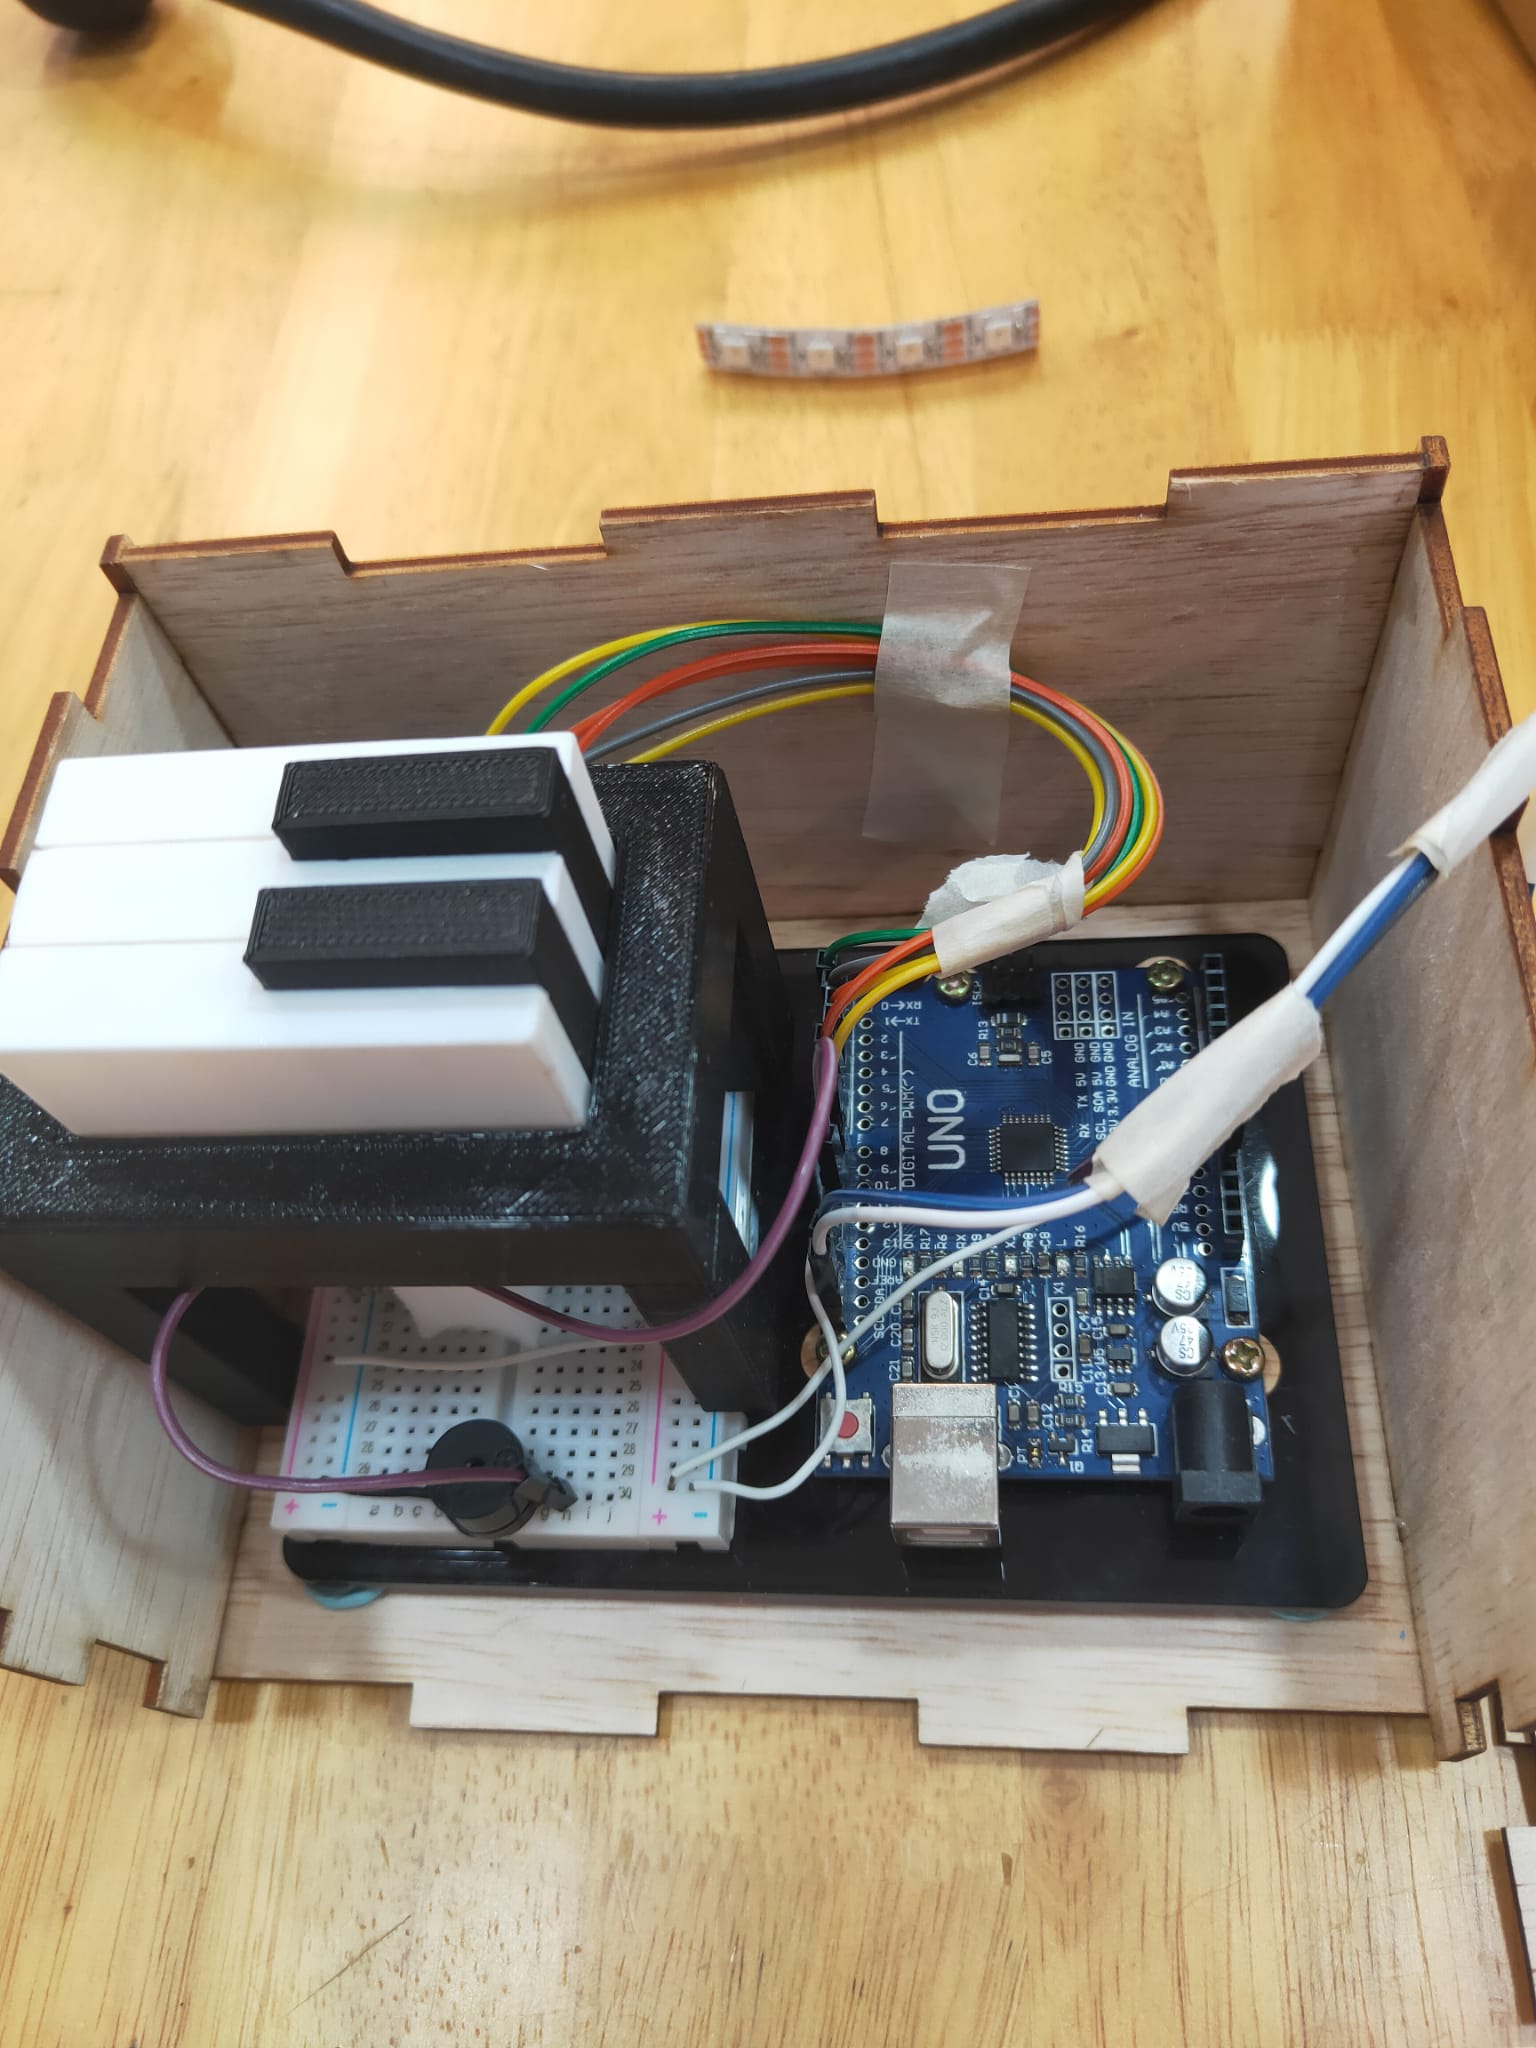
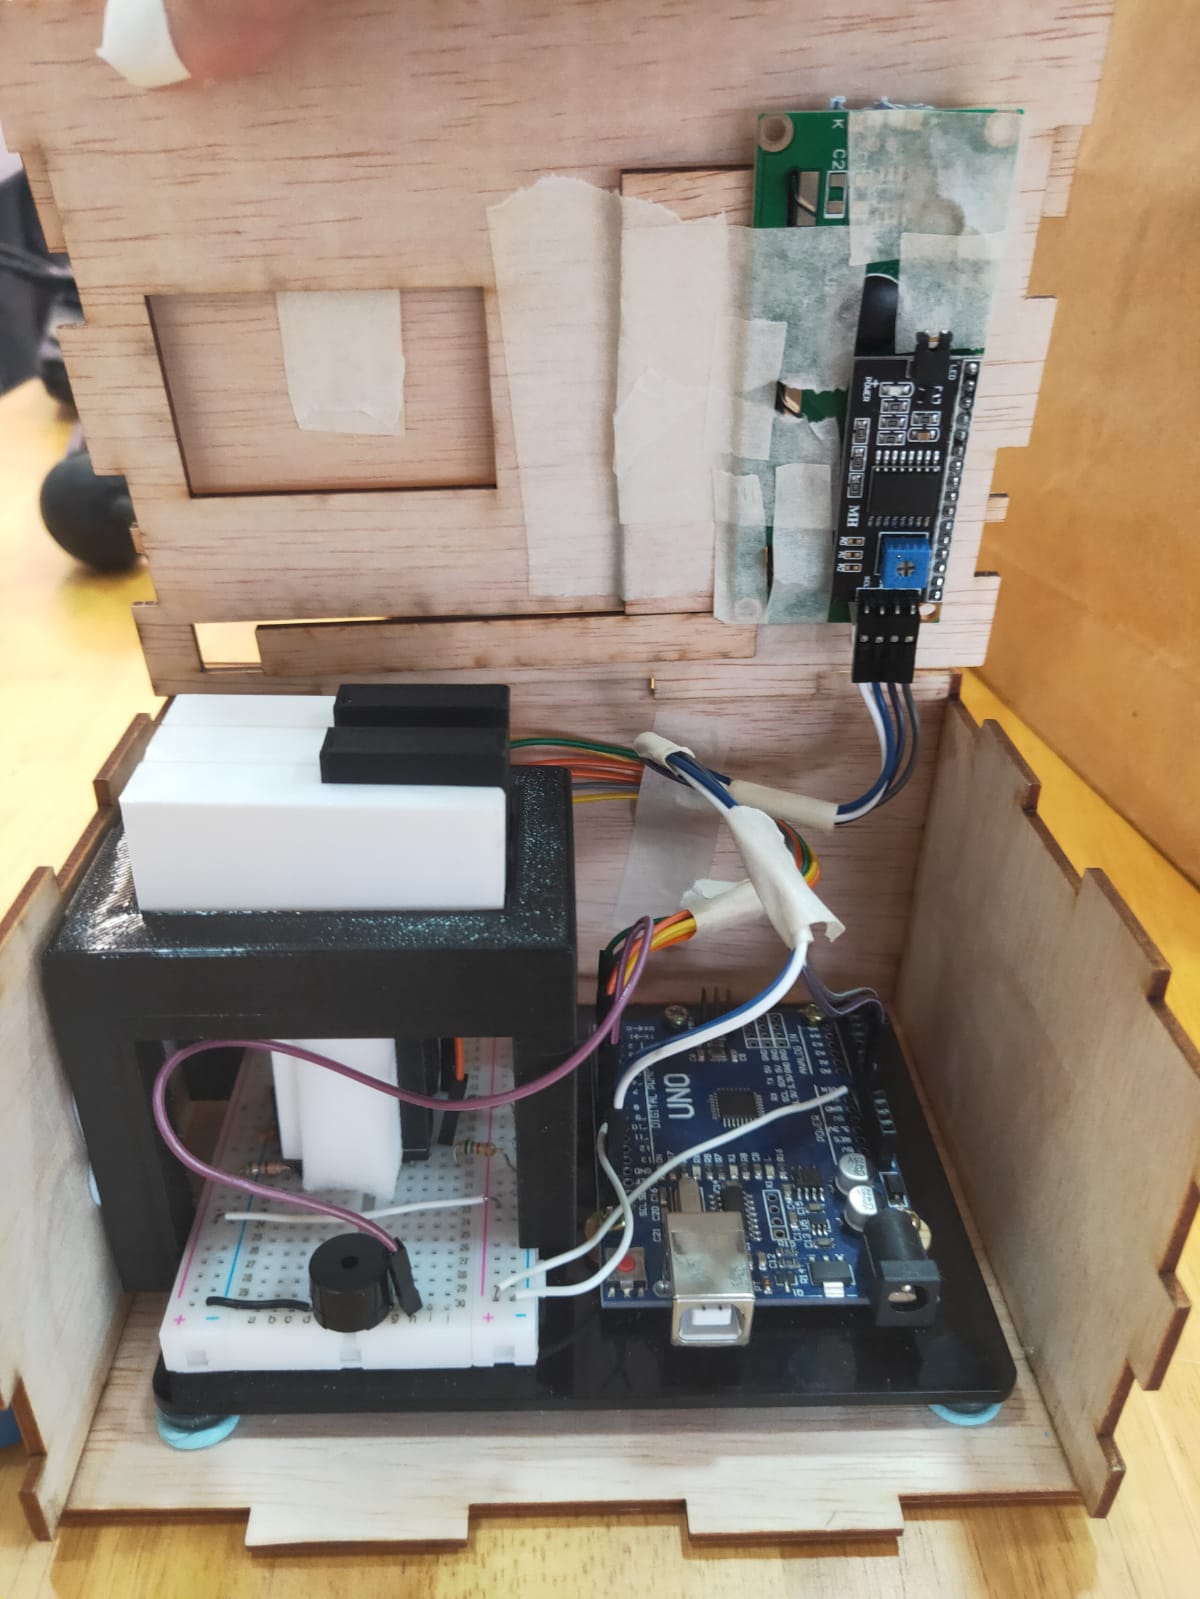
I first do the testing of all the components together than put them into the box.
After testing, I put the arduino board with the input/output devices in the box and secure the base of the arduino board with bluetacks and place piano tiles ontop of the push buttons
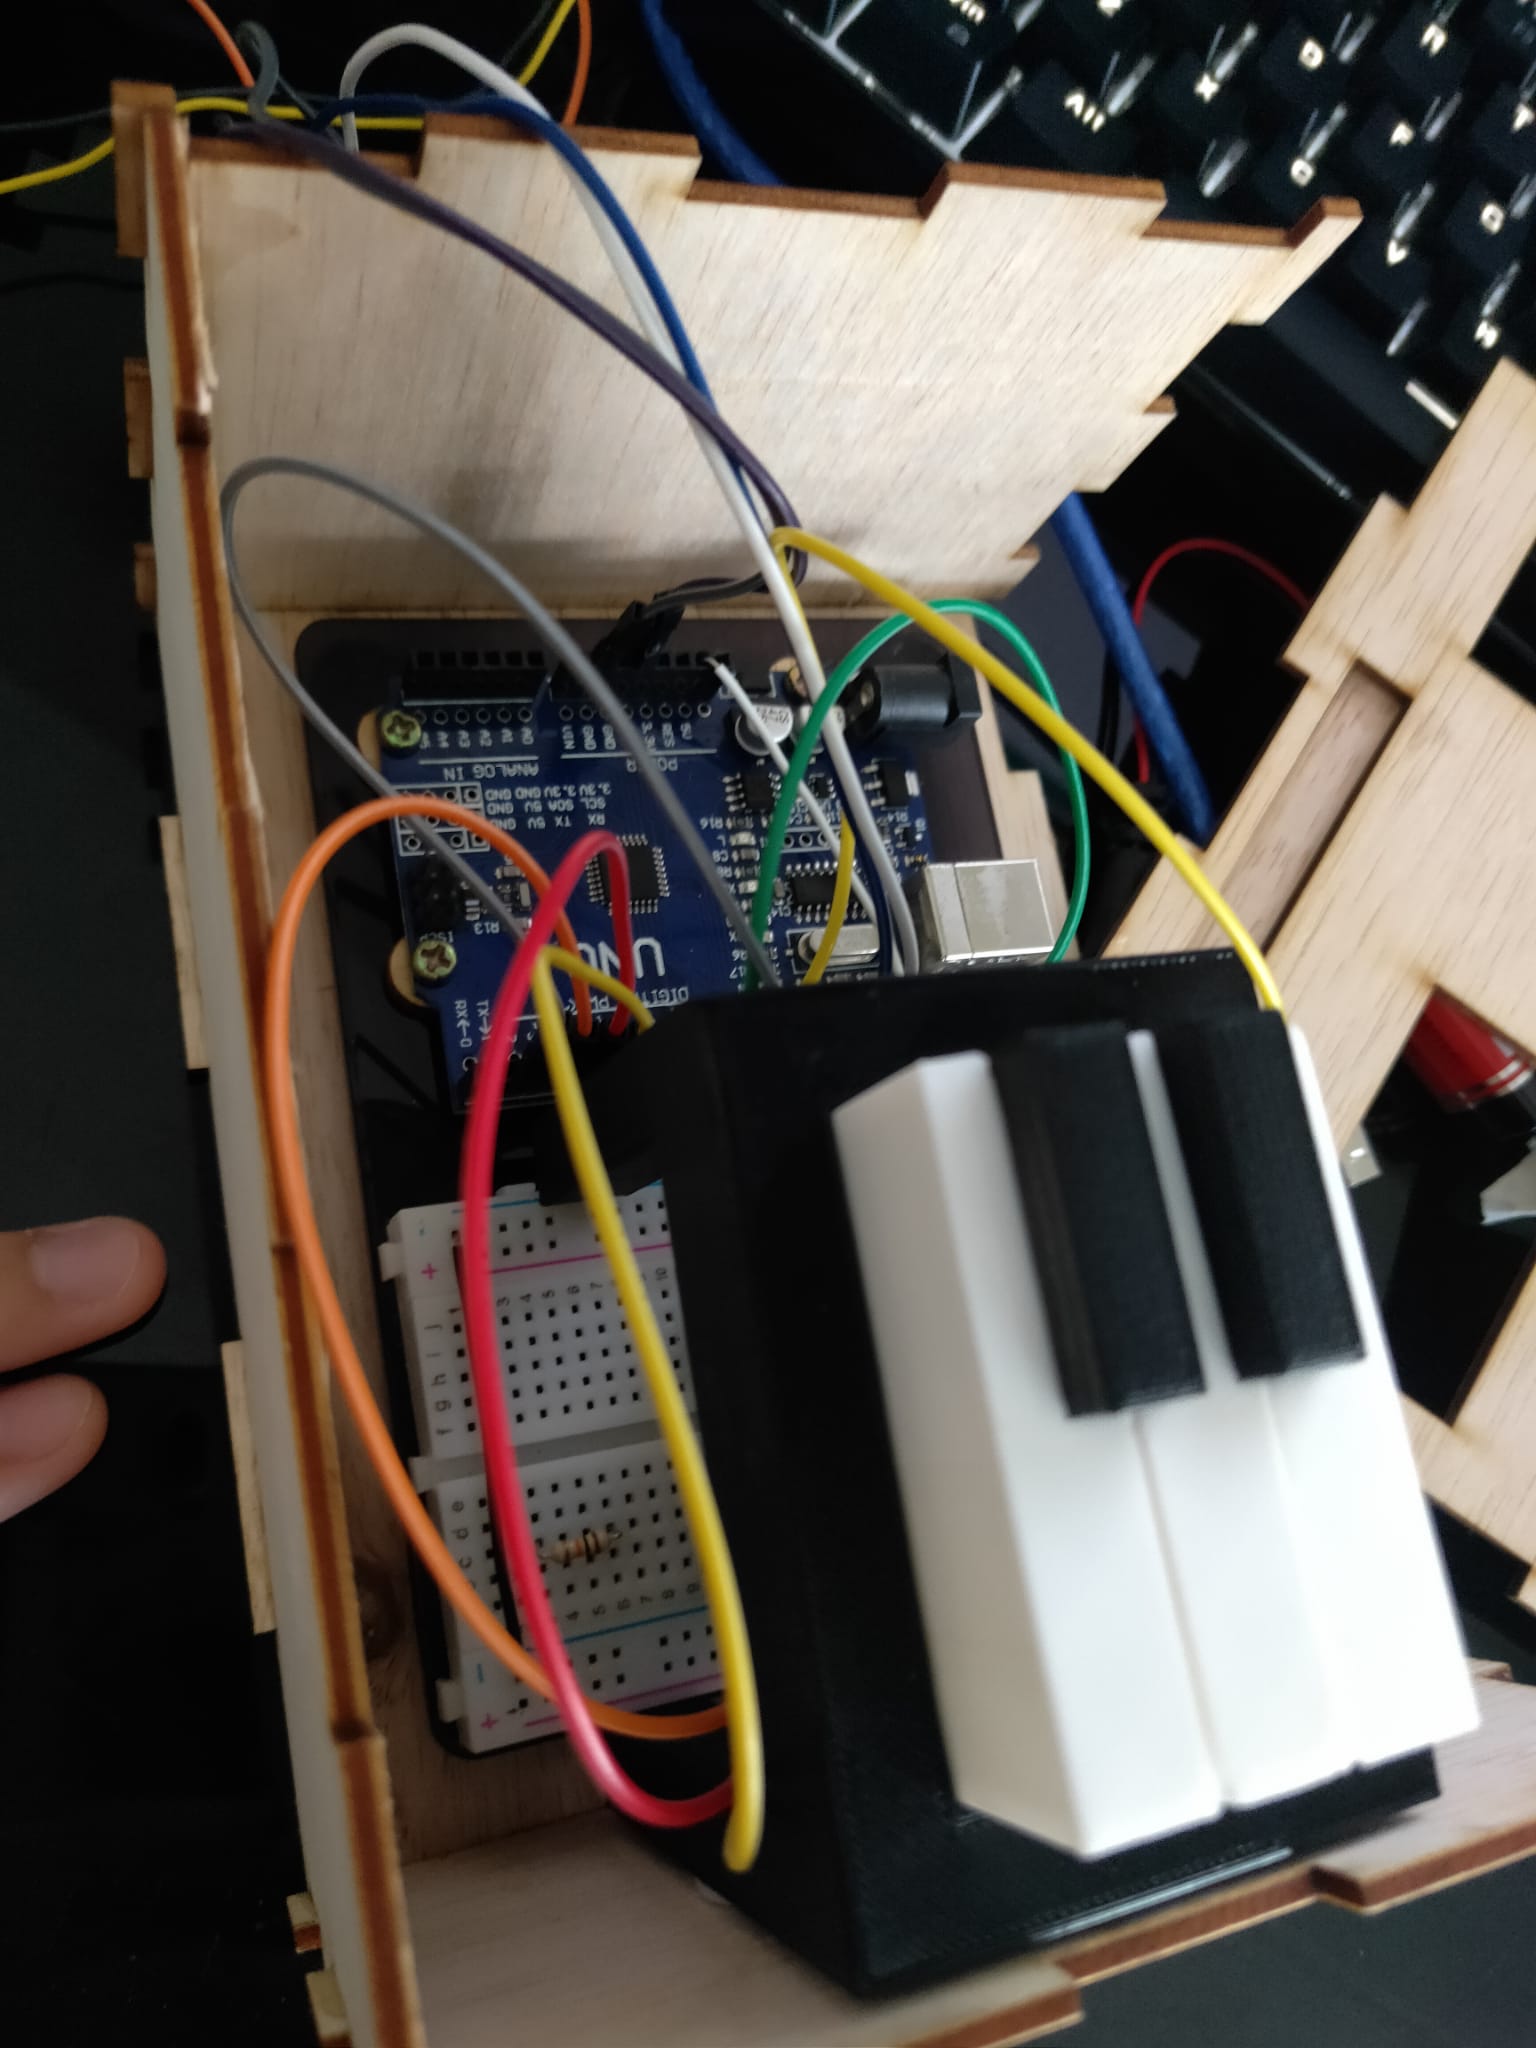
I added the LCD screen neopixel than start doing wire management.
I first use masking tape to tape the wires together than use clear tape after that to secure it better
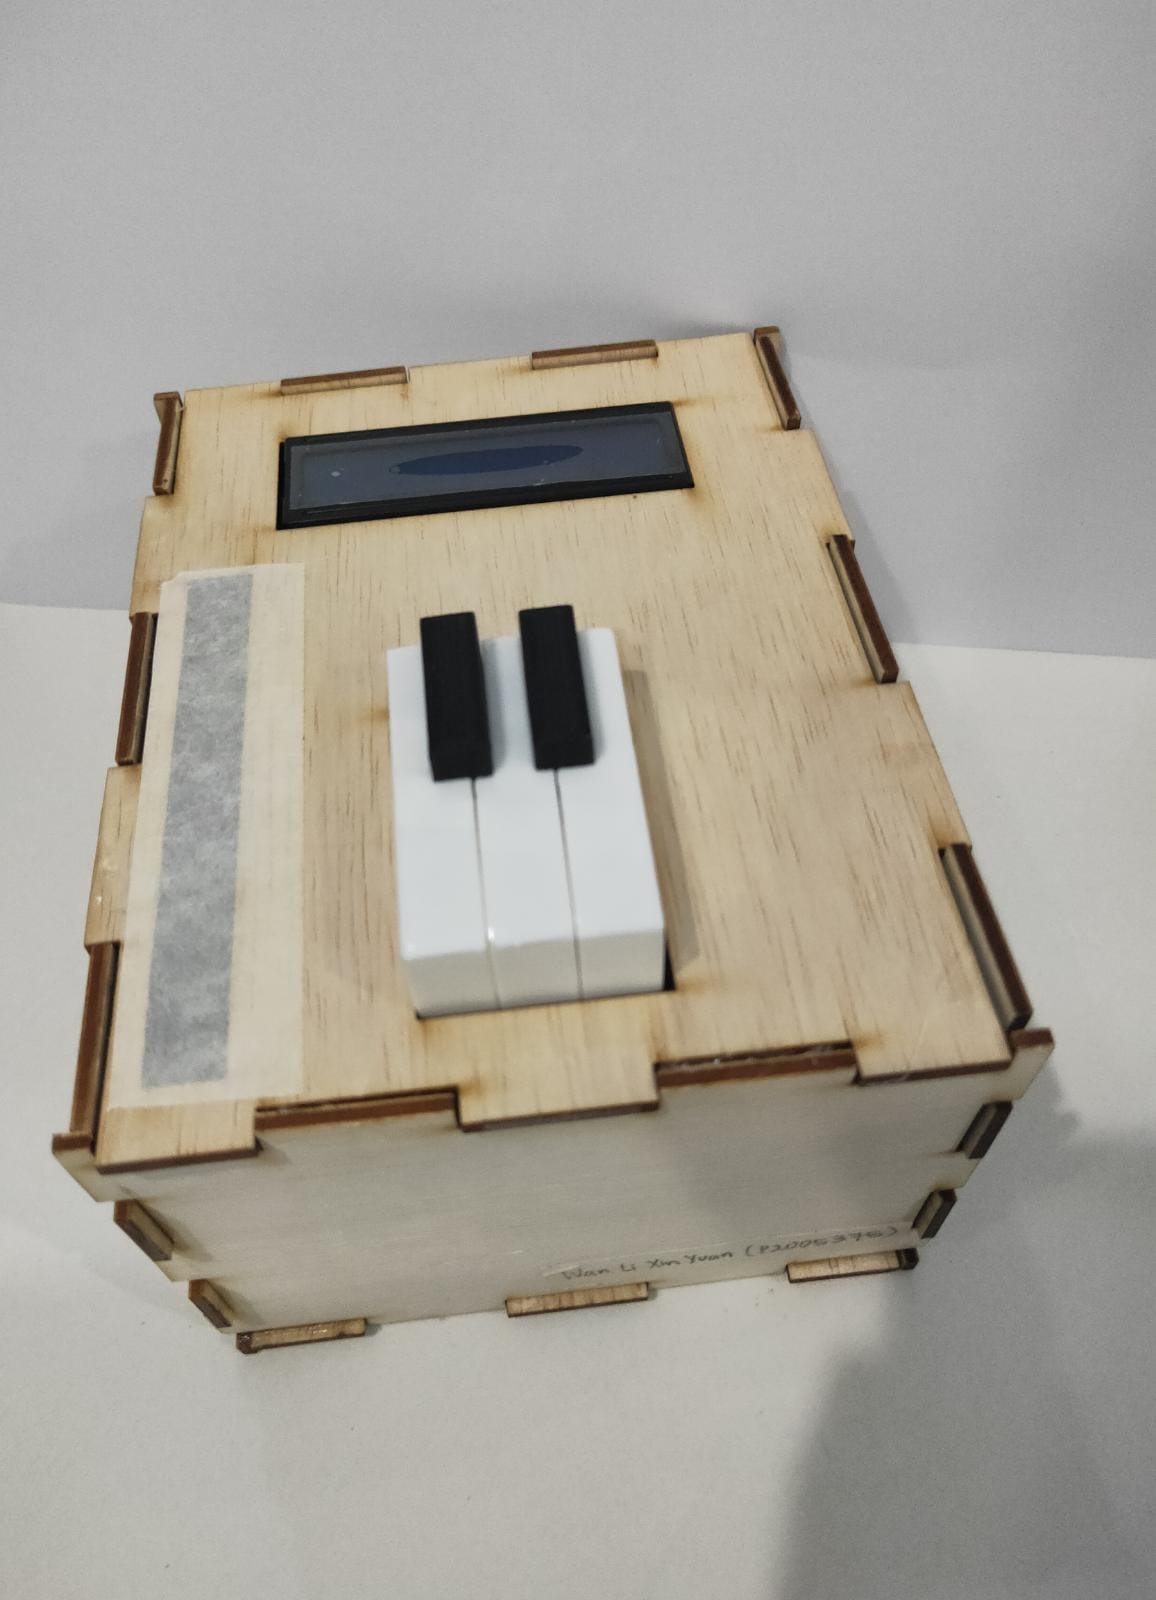
Additional program that I made
The stop button function , by pressing the center white piece
Piano_keys : Main Program
Music : Additional Program
Click here to download files.